
DIY Mason Jar Lid Christmas Tree
Making your own simple Christmas crafts is a great way to decorate your home with rustic style for the Christmas season. And if you love decorating in farmhouse style, making your own DIY decor is a fun way to add some rustic charm without having to go searching for the perfect farmhouse Christmas decorations. This holiday season, add some farmhouse style to your home by making your own farmhouse style mason jar lid Christmas tree.
This post contains affiliate links, which means I may earn a commission if you purchase something from my link (at no additional cost to you). Thanks for your support!

This rustic DIY mason jar lid Christmas tree is the perfect way to add some farmhouse charm to your Christmas decor this holiday season. In addition to being easy to make, creating your own farmhouse DIY projects for Christmas will also save you a ton of time and money!
Looking for more crafts to make with your mason jars? Check out all my fun mason jar crafts to get tons of great inspiration for a variety of great crafts!
Mason Jar Lid Christmas Tree
You’ll need just a few simple craft supplies to make your own Christmas tree made from mason jar lids. Keep reading to see how to make your own rustic Christmas tree at home.
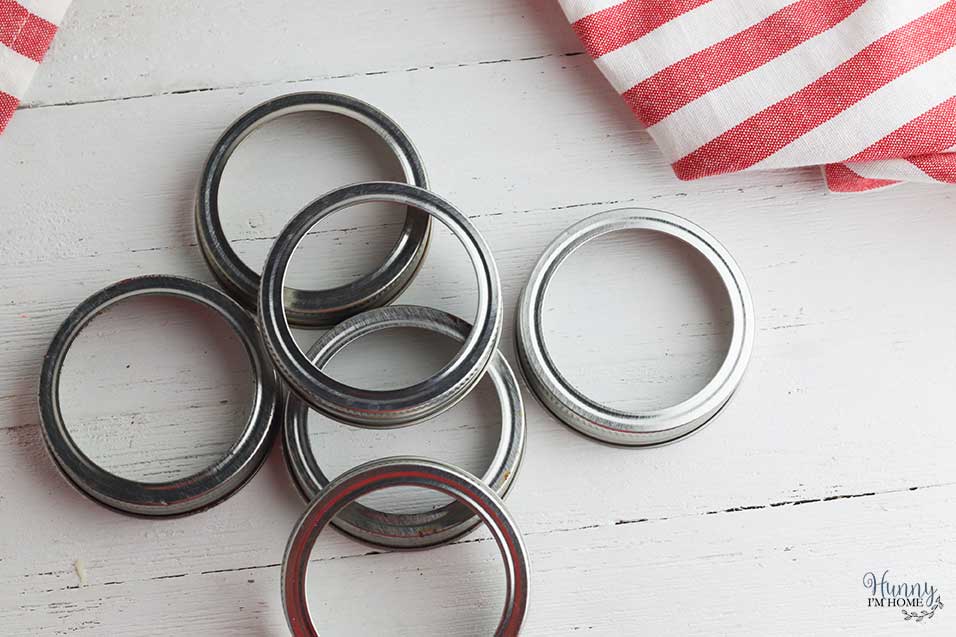
To make your jar lid Christmas tree, you’ll just need these supplies:
- Mason jar lids: You can use both wide-mouth jar lids or traditional jar lids for your Christmas tree, depending on how big you want your tree to be. Either way, you’ll need six mason jar lids to make one tree.
- Sandpaper and vinegar: If you want to give your mason jar lids a vintage look, you’ll need to use sandpaper and vinegar. Keep reading to see how to add some pantina to your mason jar lids before you make your Christmas trees.
- Twine: Add a rustic look to your mason jar lid tree with twine. You can also use ribbon to add some color to your tree.
- Ribbon: Use some plaid ribbon to decorate the top of your tree or leave it plain — it’s up to you!
- Christmas floral picks: You can also add some holiday flair to your mason jar lid tree with some holiday floral picks. I used boxwood branches and red berries for my tree.
- Mini wood candle holder: To create the trunk of the tree, I used a mini wood candle holder from Hobby Lobby.
- Hot glue gun: You’re also going to need your trusty hot glue gun to put this craft together.
How to Age Mason Jar Lids
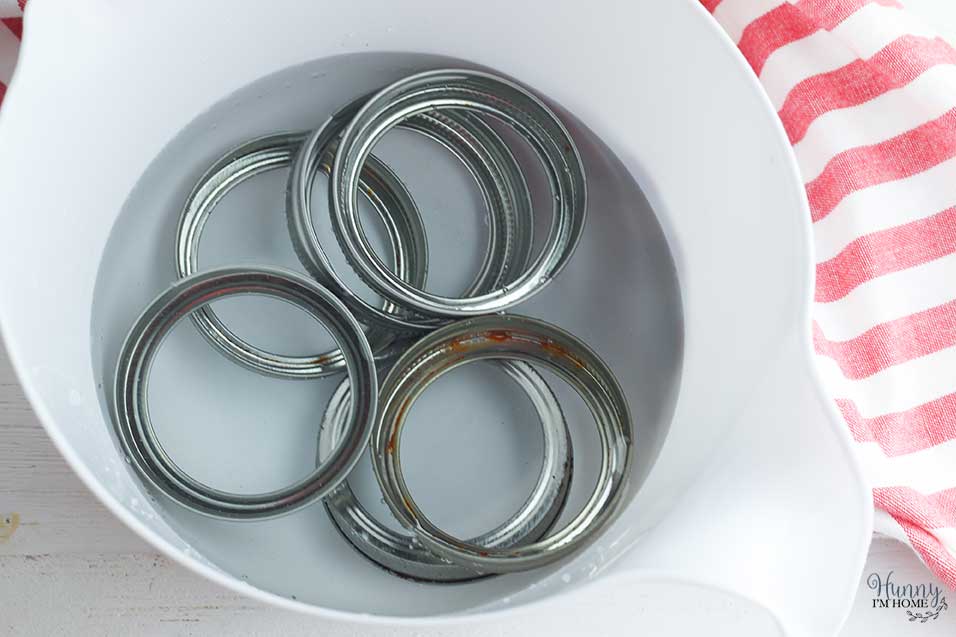
I use a lot of vintage and vintage-style decorations in my Christmas decor, so I wanted my canning jar lid Christmas tree to look vintage. And since all I had to make this craft with were new mason jar lids, I needed to age the lids to give them a rustic look.
To age mason jar lids, start by sanding all over the lids with sand paper. The more you sand, the more rustic your lids will look, so give the entire surface area of the lids a really good sanding to roughen up the outside of the metal and remove the protective coating.
Next, fill a big bowl with one part water and one part vinegar. Stir to mix the two ingredients together, then place your mason jar lids in the bowl. You want to make sure all the lids are submerged, so you might need to soak the lids in batches or have two bowls soaking at the same time.
You’ll need to soak your mason jar lids for at least one hour. But the longer you can soak them, the better. You can soak them up to overnight, so make sure you have plenty of time to give your lids a chance to soak in the vinegar. It’s also a good idea to stir the lids in the vinegar from time to time to allow the lids on top to rotate toward the bottom of the bowl.
After the lids have soaked, take them out of the liquid and place them on an old towel or some paper towels to dry. Don’t dry the lids, just let them drip dry. This step is important because the vinegar needs to react to the oxygen in the air to start the aging process. When your lids are completely dry, you can start crafting with them!
How to Make a Mason Jar Lid Christmas Tree
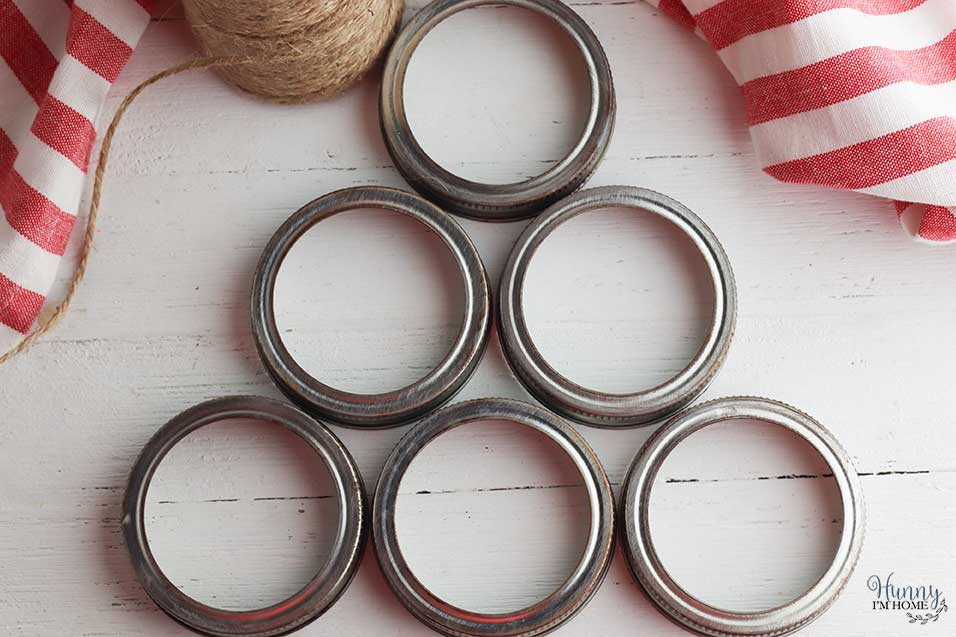
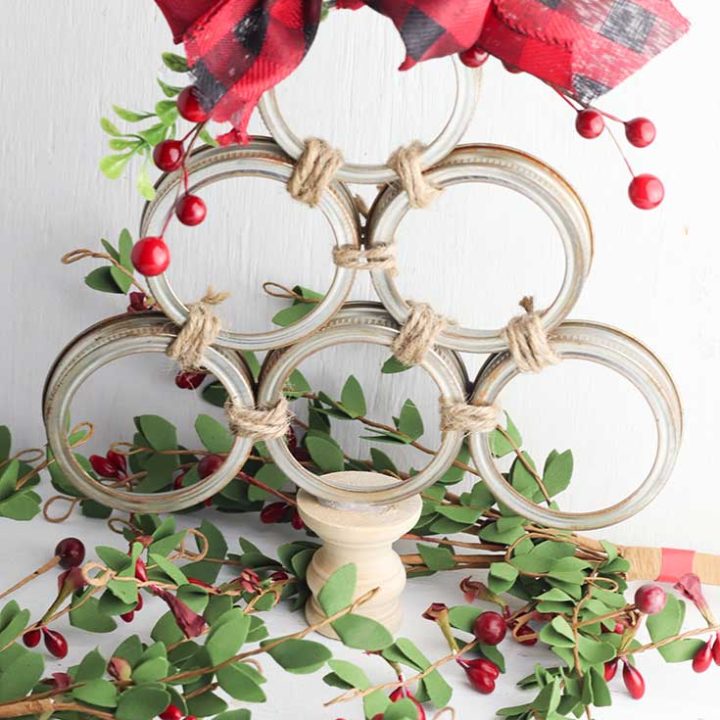
To make your mason jar lid Christmas tree, you’ll need to form a triangle shape with your lids. Start by creating the bottom row of three lids. Then, stack two lids on top of that. Finish with one lid on top.
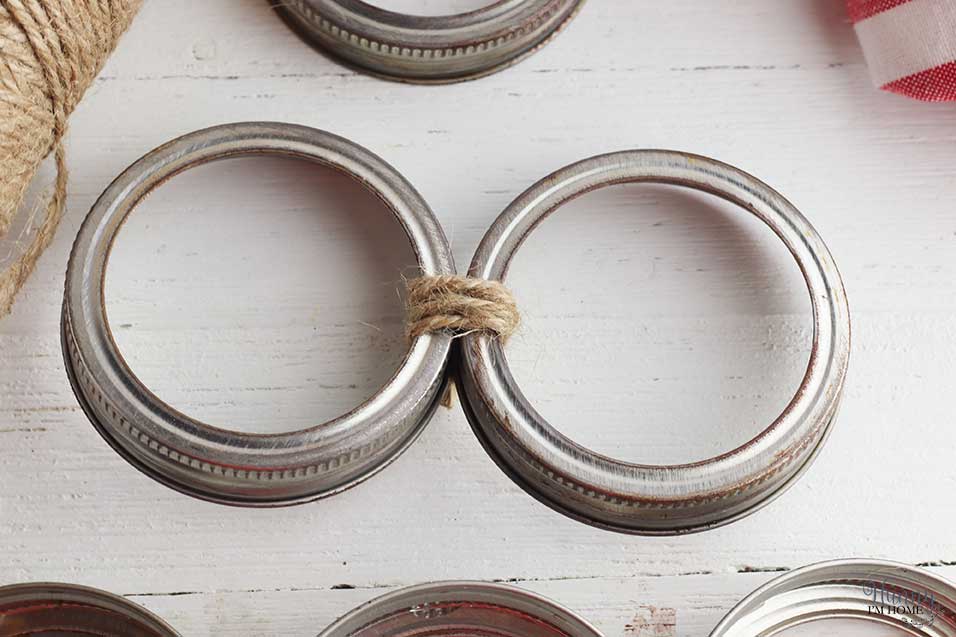
After you have your tree laid out, you can start attaching all the jars together. Start by making your rows. Attach the three bottom jar lids together by wrapping a piece of twine around the spot where the two edges of the jar lids meet.
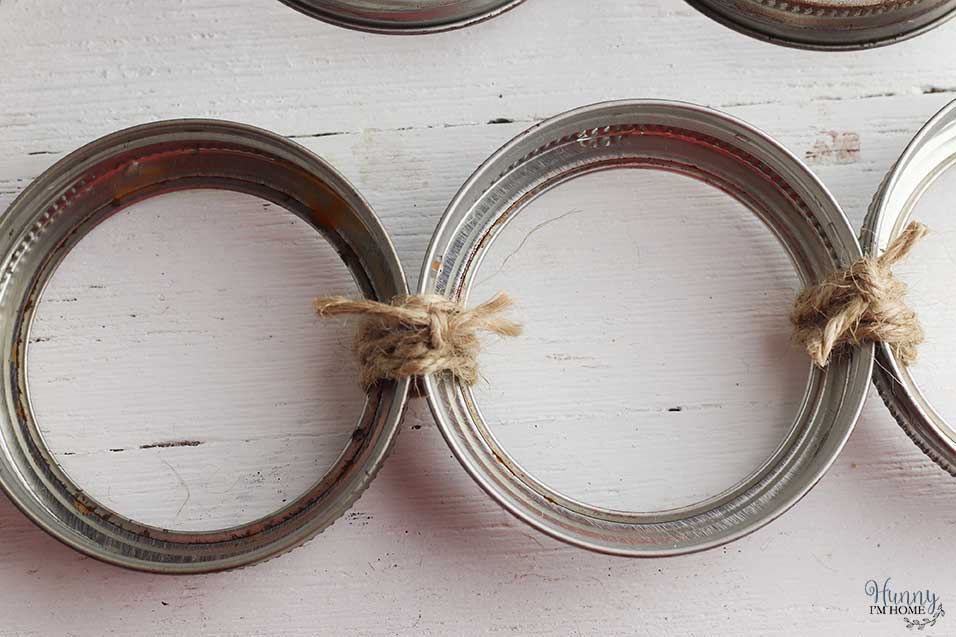
Keep wrapping until you like the look of the twine on the front of the jar. I wrapped my twine three times around each joint. Finish by tying a knot on the back, then trim away the extra twine. Make sure not to pull your twine too tight as you wrap because you’ll need to adjust the lids a little bit as you build the tree. Leaving the twine slightly loose will make it easier to manipulate the pieces once they’re all tied together.

Continue tying all the rows together, then stack your rows on top of each other to form the triangle again. After you have all your rows tied together, it’s time to attach each row to the one above it. Start by tying your row of three lids to the row of two lids. Then, attach the single lid on top.
Mason Jar Lid Christmas Tree Decorations
Now, you could leave the mason jar lid tree as it is and create a rustic mason jar lid Christmas tree wreath, but I wanted something I could place on my mantle, so I added a few more decorations.

First, I decorated the top of my canning lid tree with ribbon and some floral picks. I just cut off a couple of branches from a boxwood stem and a couple of branches of red berries and used my hot glue gun to glue them to the top mason jar lid. Then, I tied a buffalo plaid bow on the top to cover the ends of the floral picks and add a farmhouse touch to the top of the tree.

Next, I added a trunk to my mason jar lid tree with a small candle stick holder. I found this wood candlestick holder in the wood section of Hobby Lobby. To use it, I flippled the candlestick holder upside down and use the solid bottom to create the base for my tree. I loaded up the wood with hot glue and pressed my mason jar lid tree on top of the glue. Then, I held it in place until the glue cooled down and hardened.
Canning Jar Lid Christmas Tree Ideas
I love the look of my rustic jar lid tree, but there are so many different ways to make this fun craft! Add your own style to your DIY Christmas decoration with these simple ideas.

- Paint the lids. For a more festive look, skip the aging step and paint your lids instead. You can paint them green to look more like a real Christmas tree, red to add some holiday cheer to your decor, or white to give them a more classic look.
- Skip the trunk. Instead of adding a trunk to your tree, just skip that step altogether. The tree will stand up fine if you lean it against something. Or you can easily hang it to turn it into a cute mason jar lid Christmas tree wreath.
- Add some ornaments. Make your tree even more Christmasy with the help of mini ornaments. You can hang ornaments inside each mason jar lid to add a pop of color to your tree.
- Change the size of your tree with different lids. I used regular mouth lids to create this mason jar lid Christmas tree. But you could also use wide mouth lids to make a larger tree. Or create two trees and decorate with both sizes!
No matter how you choose to make these beautiful mason jar lid Christmas tree, I’m sure it’s going to look amazing with the rest of your holiday decor!
DIY Mason Jar Lid Christmas Tree
Turn mason jar lids into a rustic holiday decoration with this easy DIY mason jar lid Christmas tree craft.
Materials
- 6 mason jar lids
- Vinegar
- Water
- Sandpaper
- Twine
- Ribbon
- Floral picks
- Wood candlestick holder
Tools
- Hot glue gun
Instructions
- To age the mason jar lids, use sandpaper to sand around the outside of the lids.
- Fill a bowl with one part vinegar and one part water. Submerge the lids in the vinegar mixture and allow them to soak for at least one hour, up to overnight.
- Remove the lids from the water and allow them to air dry.
- When the lids are completely dry, form a triangle with the lids, placing three lids on bottom, two in the center, and one on top.
- Attach all the lids together by wrapping twine around the sides where two lids meet. Continue wrapping until all the lids are attached together to form a free-standing triangle.
- Decorate the top of the tree with floral picks and ribbon.
- Glue the bottom of the tree to a small wooden candlestick holder to form the trunk.
More Fun Christmas Craft Ideas:
Coffee Filter Christmas Wreath
The Best Mason Jar Gifts to Give This Christmas
If you like this post, you’ll probably like these:


Emily is a midwestern mom of two boys. She loves all things DIY — from home renovations to kids birthday party planning. Whether she’s making a new farmhouse craft for her home or helping her kids with a cool activity, you can bet she’s in the middle of some kind of DIY project (or three) right now!





Hi, Emily! I have been all over your blog after I found yoU! This jar lid holiday decor turned out so cute! I would love to invite you to link up your project at Whimsy Home Wednesdays to inspire others and have a chance to be featured https://www.artsandclassy.com/category/diy/whimsy-home-wednesdays-linky-party/
LOVE this tree Emily, such a BRILLIANT idea! We will be featuring you starting Wednesday at the Creative Crafts Linky Party! Pinned and shared
Creatively, Beth
Thanks so much for the feature, Beth!!
Emily, your canning jar Christmas tree is sooo cute!!! I would think this would be a fun project to make with your kids or my grandson as he gets older. Shared to Pinterest (always!) and I’m happy to feature your post at this evening’s Share Your Style #371 for you. <3
Happy Christmas time to you and your family,
Hugs,
Barb 🙂
Thank you so much for the feature!!
I’m going to make this, but I will add pieces of my Dads plaid shirts to the rings. This will be a nice way to use his clothes and remember him.
💕