Lego Christmas Tree Craft for Kids
If you’re hoping to make the holidays at home special for your kids this year, why not add a few simple Christmas crafts to your schedule? Making Christmas crafts together with your kids is a great way to enjoy each other’s company during the holidays! You can create memories with your kids and spend time together while being a little creative. This cute Lego Christmas tree craft for kids is a fun activity that gives your kids a chance to practice their STEM skills, too.
This post contains affiliate links, which means I may earn a commission if you purchase something from my link (at no additional cost to you). Thanks for your support!

Both my kids love Christmas, so I’m always on the hunt for fun holiday activities to do together. And since my kids are obsessed with LEGOs, we have tons of bricks laying around to create with. This year, we made a cute Christmas tree out of LEGO bricks to hang on the tree!
Looking for more kids craft ideas? Check out these simple crafts for kids to find more fun projects to make during the holiday season.
How to Make a LEGO Christmas Tree
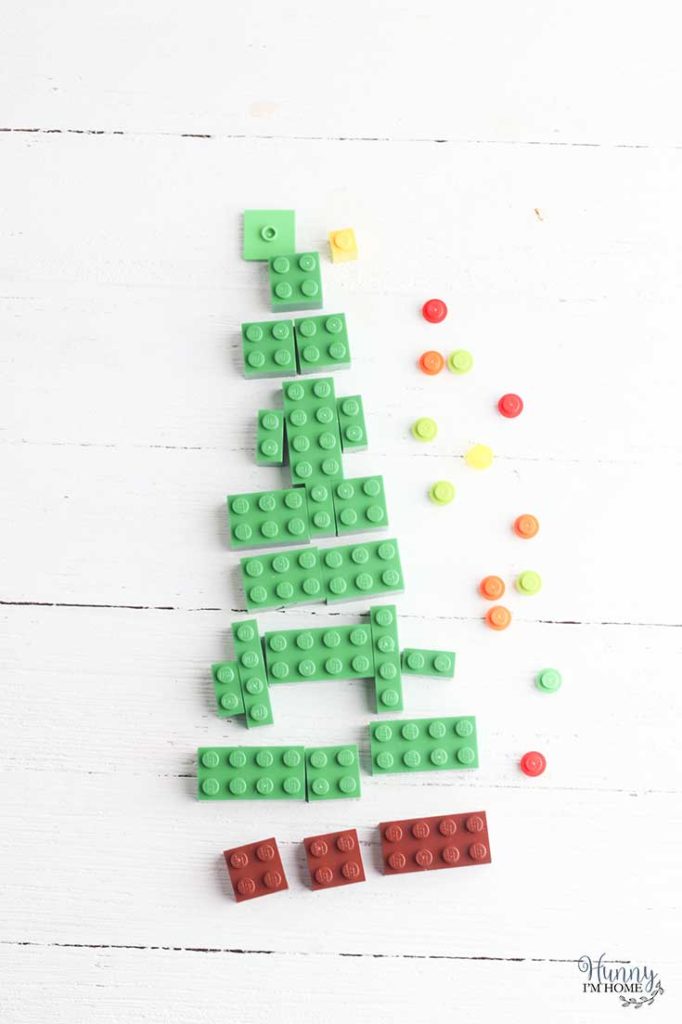
To make your own LEGO Christmas tree craft, you’ll need a few different colors and sizes of LEGO bricks. Put together this adorable Christmas tree at home with these LEGOs:
- 2 2X2 brown bricks
- 1 2X4 brown brick
- 5 2X2 green bricks
- 3 2×3 green bricks
- 4 2×4 green bricks
- 5 1×2 green bricks
- 2 1×4 green bricks
- 1 1×1 yellow brick
- 1 2×2 green jumper plate
- 13 round 1×1 plates, various colors
- String
- Glue
So, gather up your bricks and get started on your own Christmas tree craft for kids right now!
How to Make Santa with Popsicle Sticks

The first step to making your Christmas tree out of LEGOs is to build the trunk. To create the trunk, stack two 2×2 brown blocks on top of each other, then place one 2×4 brown block on top of that.

Then, create the base of your Christmas tree with one 2×2 green brick in the center of the brown block and one 2×4 green brick on each side.

Next, you’re going to give your LEGO Christmas tree a 3D effect by turning some of the blocks vertically so you can decorate them with ornaments later. To do this, place one 2×4 brick in the center, then add a 1×4 inch brick on each side. Place the 1×4 bricks sideways so the ends stick out on each side. Finish this row with one 1×2 brick on each end.

After that, you’ll add two rows of bricks. The rows need to be a total of 2×6, so you can use any makeup of bricks to create that size. We used four 2×3 bricks on our LEGO Christmas tree.
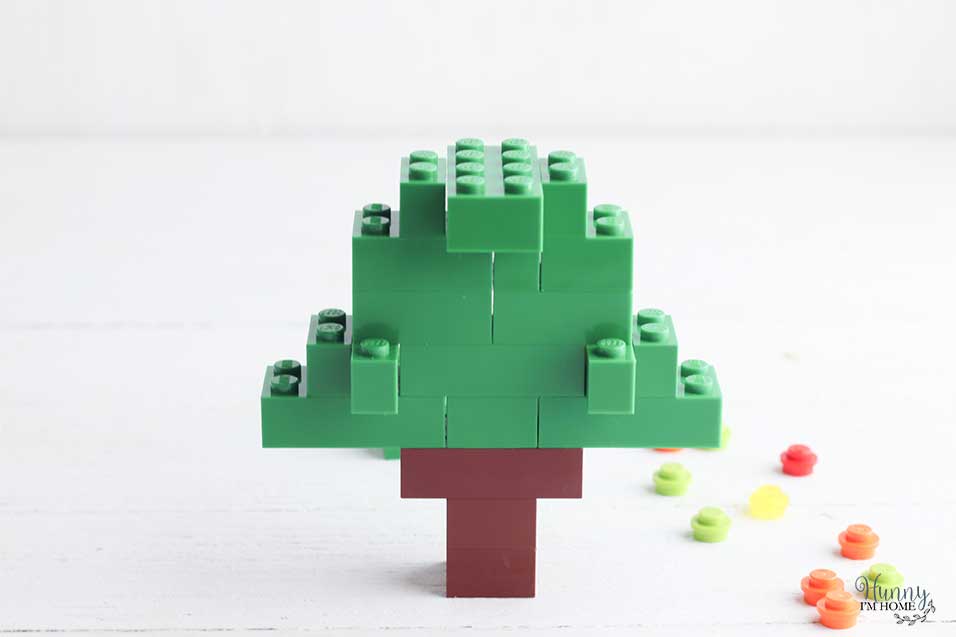
The next row will be another 3D row. Grab a 2×4 brick and place it sideways on the tree so that each end is overhanging. Then, place a 1×2 brick on each side.

Top that row with two 2×2 bricks. Or you could use one 2×4 brick to create this row.
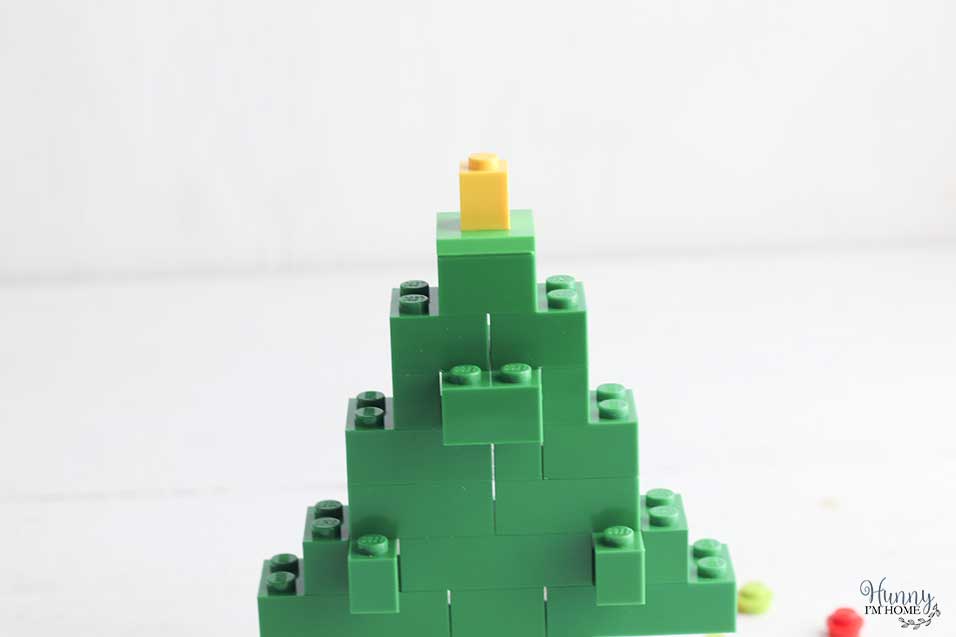
Nexxt, you’ll create the top of your Christmas tree. Start by placing one 2×2 brick in the center of the row. Then, place a 1×1 plate on top of the square piece. Add your “star” to the top of your LEGO tree by putting a 1×1 yellow brick on the very top of the tree.

Now it’s time to decorate your LEGO Christmas tree! Start by placing a yellow 1×1 plate on the top of your yellow brick, then add various colors to all the other open spots on your Christmas tree. To decorate our tree, we used light green, red, and orange bricks.
LEGO Christmas Tree Ornament Craft

Now that you have your LEGO Christmas tree decorated, you can easily turn it into an ornament for your Christmas Tree! Just create a loop with a piece of ribbon and use your hot glue gun to attach the ribbon to the back of the tree. After the glue dries, you can add it to your tree!

One thing that I love about this Christmas tree craft for kids is that you can adjust the instructions according to the LEGO bricks you have at home. Just follow this guideline to make your Christmas tree, using any combination of bricks to create the structure:
- Trunk: two 2×2 topped with 2×4
- Row 1: 2×10
- Row 2: 2×8
- Rows 3 and 4: 2×6
- Rows 5 and 6: 2×4
- Row 7: 2×2
- Top: 1×1

Lego Christmas Tree Craft for Kids
Use Legos to create a fun Christmas tree craft. It's a great holiday project to make with your kids that's also educational!
Materials
- 2 2X2 brown bricks
- 1 2X4 brown brick
- 5 2X2 green bricks
- 3 2x3 green bricks
- 4 2x4 green bricks
- 5 1x2 green bricks
- 2 1x4 green bricks
- 1 1x1 yellow brick
- 1 2x2 green jumper plate
- 13 round 1x1 plates, various colors
- String
- Glue
Instructions
- Make the trunk by stacking 2 2x2 blocks with one 2x4 brick on top.
- Add one 2x2 brick to the center of the trunk and two 2x4 bricks on each side.
- Place one 2x4 brick in the center of the stack, then one 1x4 brick on each end lengthwise. Finish the row with one 1x2 brick on each end.
- Place two 2x3 bricks on the next row.
- Make the next row with one 2x3 brick, one 1x2 brick, and one 2x2 brick.
- Add one 2x4 brick lengthwise in the center of the next row and one 1x2 brick on each side of the larger brick.
- The next row is two 2x2 bricks.
- Top with one 2x2 brick, one green jumper plate, one 1x1 yellow brick, and one 1x1 yellow round plate.
- Decorate each end of the bricks with remaining 1x1 plates.
- Create a loop with a piece of string and glue it to the back of the Christmas tree to hang.
More Fun Kids Craft Ideas:
Adorable Toddler Christmas Tree Craft for Kids
Lego Parachute Coffee Filter Activity
If you like this post, you’ll probably like these:


Emily is a midwestern mom of two boys. She loves all things DIY — from home renovations to kids birthday party planning. Whether she’s making a new farmhouse craft for her home or helping her kids with a cool activity, you can bet she’s in the middle of some kind of DIY project (or three) right now!