
Dollar Tree Mason Jar Sign with Free SVG
Creativing farmhouse style decorations for your home is a great way to add a personal touch to your decor. But putting together DIY projects can get expensive if you aren’t careful! Luckily, you can find tons of rustic craft supplies at the dollar store to put together some amazing (and budget-friendly) Dollar Tree crafts. With the help of your Cricut, you can turn a Dollar Tree mason jar sign into a rustic decoration for your home in a matter of minutes.
This post contains affiliate links, which means I may earn a commission if you purchase something from my link (at no additional cost to you). Thanks for your support!

This rustic DIY mason jar sign is the perfect way to decorate your home with a little bit of farmhouse style! On top of being easy to make, you can create your own using a sign from Dollar Tree, some paint, and your Cricut.
Looking for more Dollar Tree DIY decorations? Check out this amazing metal word sign using supplies from the dollar store!
Dollar Tree Mason Jar Sign
Finding cheap and easy decoration ideas is one of the best ways to save money while adding a rustic farmhouse look to your home. But just because you’re saving money on your DIY decor doesn’t mean those decorations have to look cheap. This adorable DIY Dollar Tree sign is so cute, no one will ever know you purchased it at the dollar store.
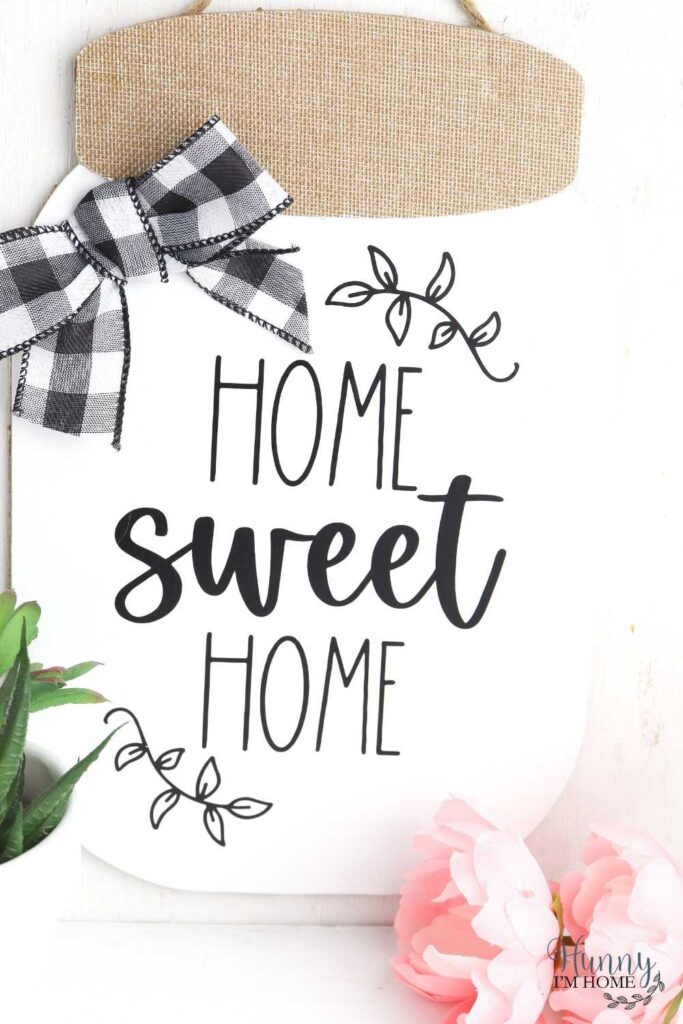
To make your Dollar Tree mason jar sign, you’ll just need a few simple supplies from the dollar store, including:
- Mason jar sign: The base of my mason jar sign is a sign I found in the seasonal section of the store during the fall. I love the rustic burlap look that appears on the top of the sign. I’ve also seen mason jar shaped signs during other seasons, including Christmas and spring, so you shouldn’t have any trouble finding one in your store! But if you can’t find a mason jar sign at Dollar Tree, they’re also available on Amazon.
- White chalk paint: Use some white chalk paint to turn your Dollar Tree sign into a farmhouse style sign instantly.
- Black vinyl and transfer tape: Add some farmhouse style words to your mason jar sign with the help of black vinyl. Any black vinyl and transfer paper will work for this project!
- Home Sweet Home SVG file: Keep reading to see how to get your copy of this free Home Sweet Home SVG file to make your own ornaments.
- Cricut: To add the words to your DIY farmhouse sign, you’ll need a cutting machine to cut the vinyl. I use the Cricut Explore Air 2 and love it!
Free Mason Jar SVG File for Cricut
You’re going to need to add some cute lettering to your mason jar sign to give it some farmhouse style. Grab my free SVG cut file for your Cricut to make your own sign at home!
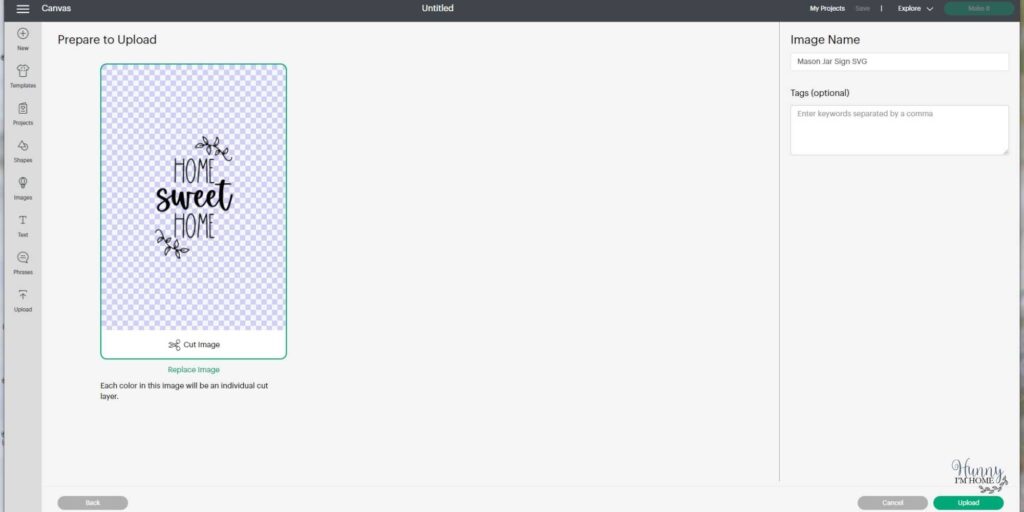
The first step to making your own sign at home is to grab your free download. That means to make this rustic jar sign, you’ll need to start by downloading the free SVG cut file for your Cricut. Get yours by signing up for my newsletter here.
After subscribing, you’ll receive a welcome email with a password exclusively for my subscribers. If you don’t see the message shortly after submitting your contact information, be sure to check your junk or spam folders and add my email as to your safe list! I’ll keep you up-to-date on new freebies and other posts twice a month after that.
After downloading the SVG file, unzip your file and upload it into Design Space. After loading the SVG, you’ll notice that each letter of each letter and other design elements is a separate element. Click your mouse to select all the letters of the words and the branches trees on the top and bottom, then group them together with the group function in the upper right corner. After that, weld the letters and trees together so they stay as a group when you’re ready to cut them.
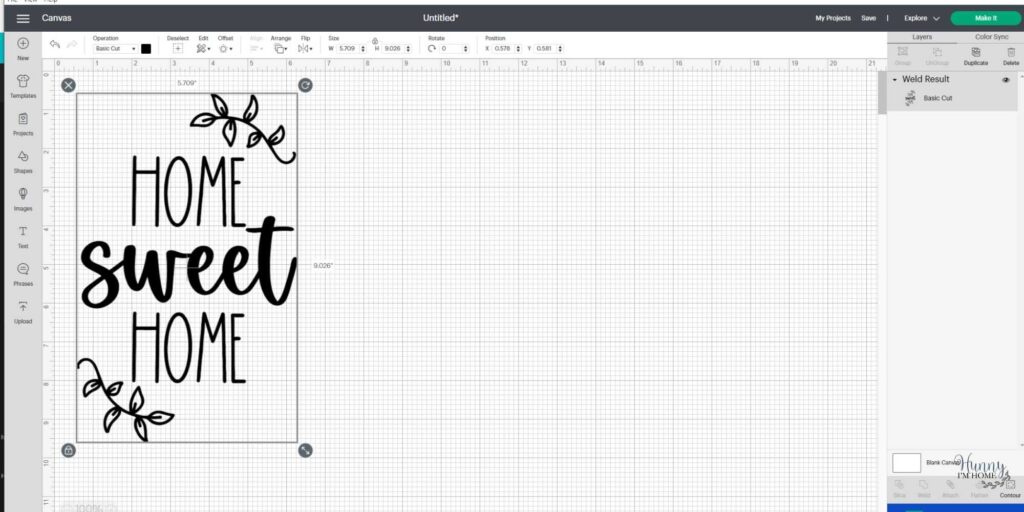
When all the words and branches are welded together, you can resize the design to fit on your sign. As you’re resizing, make sure to measure the width and height of your sign. If you’re using the same dollar store sign I used, the design should be around 5 inches wide.
When your Home Sweet Home design is the correct size, you can start cutting. Just hit the Make It button at the top and send your sign design to your Cricut to cut.
DIY Mason Jar Sign
Once you have your SVG file downloaded and cut with your Cricut, it’s time to get the sign ready. If you’re using a plain wood sign to make this mason jar craft, skip the first step listed below and go straight to painting. Otherwise, keep reading for some tips on how to prep your Dollar Tree sign for paint.
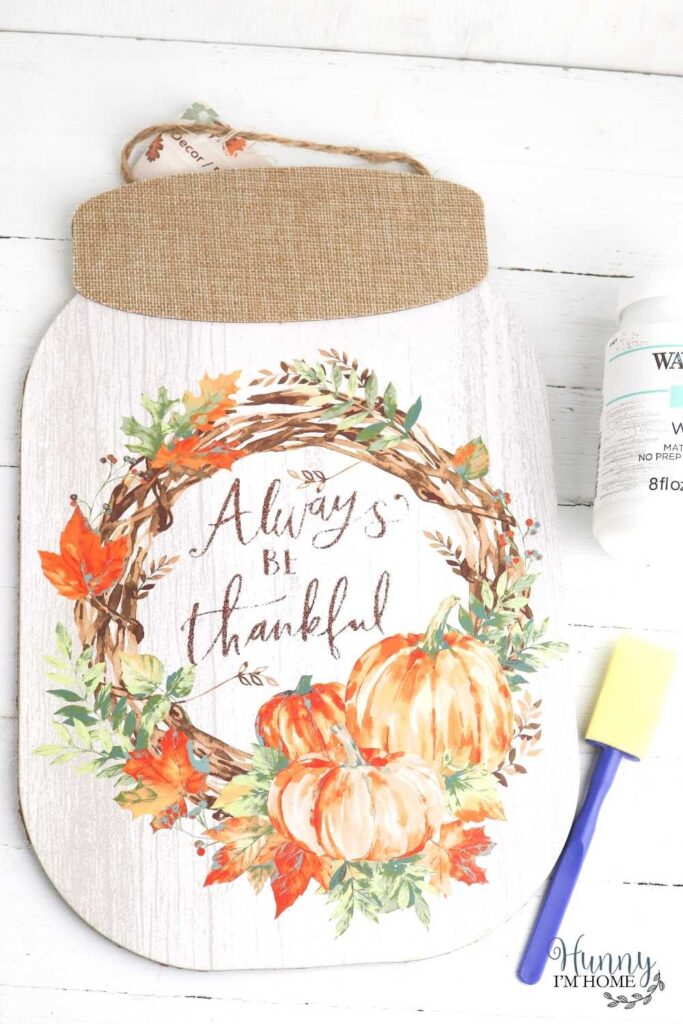
I found this fall mason jar sign in the seasonal section of the dollar store during the fall months. But I wasn’t a fan of the fall design and wanted to turn it into a year-round decoration I could add to my shelf.
To transform this sign, I used two supplies:
- Sandpaper or a sanding block
- Chalk paint
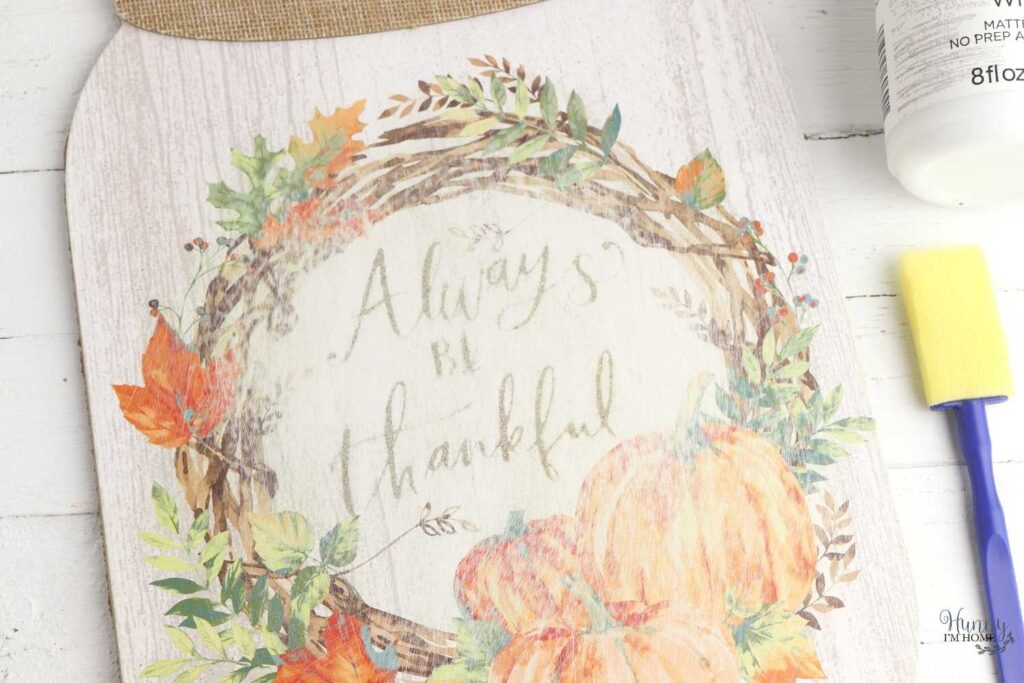
Since this sign features glitter on the words, the first step was to use the sand paper to remove all the glitter. If you don’t do this step, the glitter will poke through the paint and will give your sign an uneven surface.
But it’s easy to remove the glitter. Just rub the sandpaper over the top of the sign until all the glitter is gone. I suggest holding the sign over the trash cake while you’re doing this step to keep the glitter from getting everywhere.
After all the glitter is gone, rub the sandpaper over the rest of the sign to rough it up a little bit. This will create a better surface for the paint to stick to, ensuring you don’t have streaks as you’re painting.
Finish by using a damp paper towel to wipe off all the dust from the front of the sign. Let the surface dry completely before starting to paint.
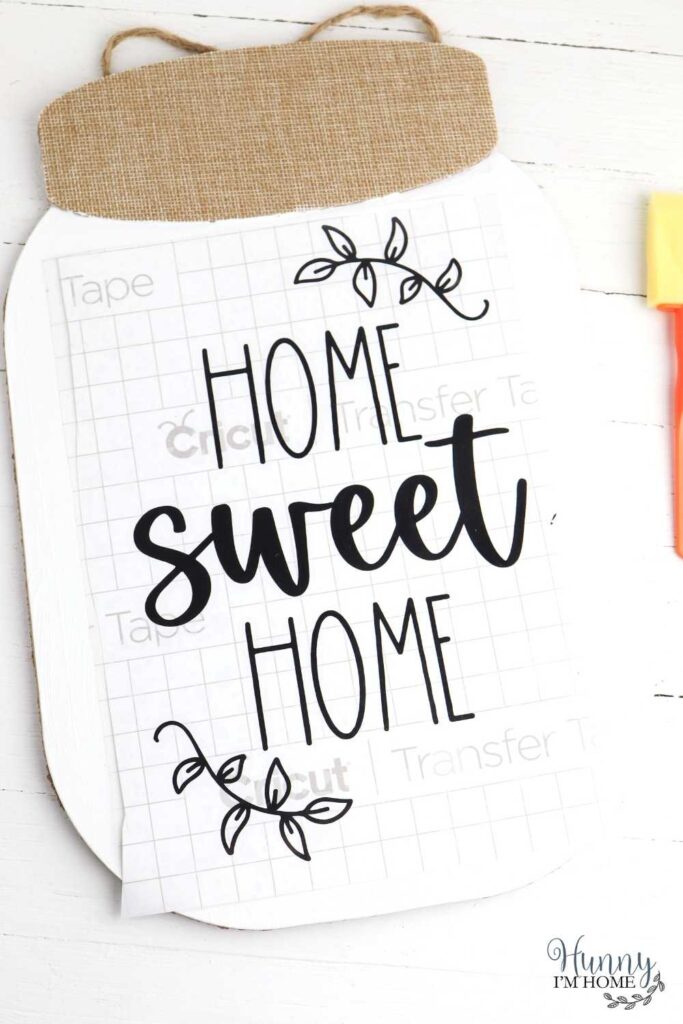
Once your sign is prepped and ready to go, you can start adding your chalk paint. I put four layers of paint on my sign to fully cover the design on the front.
While your paint is drying, use your Cricut weeding tool to remove all the extra vinyl surrounding your Home Sweet Home vinyl design. Then place a piece of transfer tape on top to transfer the words from the vinyl backing to the mason jar sign.

Transfer the vinyl design to the front of the sign, pressing the vinyl onto the sign, then slowly removing the transfer tape.
Finish by tying a cute plaid bow on the top. You can get this pattern of ribbon at Dollar Tree, too. All I did was tie a bow with the ribbon, then use my hot glue gun to attach it to the top of the sign.
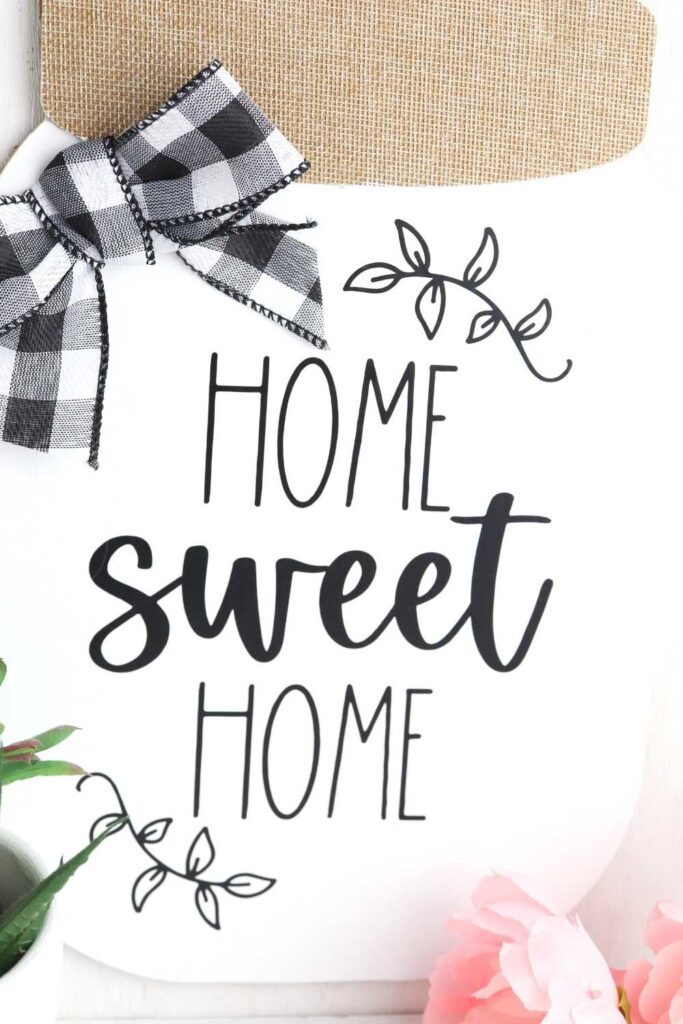
Hang this fun farmhouse sign anywhere in your home to add some rustic charm to the room. Or add it to a wreath to welcome your guests to your home. There are so many great ways to decorate with this sign, you might want to make a few!

Mason Jar Sign
Turn a dollar store sign into a cute farmhouse decoration for your home with this mason jar sign craft.
Materials
- Mason jar sign
- White paint
- Black vinyl
- Ribbon
Tools
- Paint Brush
- Cricut
- Glue Scissors
Instructions
- Paint the sign white and allow the paint to dry completely.
- Upload the SVG into Design Space and resize if needed.
- Cut the design on black vinyl and use the weeding tool to remove the extra vinyl from around the design.
- Use transfer tape to transfer the vinyl onto the sign.
- Tie the ribbon into a bow and glue it to the top of the sign.
More Fun Dollar Tree Craft Ideas:
Dollar Tree Rae Dunn Candles with SVG
15 Ways To Organize Your Entire Home From The Dollar Store
20 Easy Dollar Tree Party Ideas
If you like this post, you’ll probably like these:


Emily is a midwestern mom of two boys. She loves all things DIY — from home renovations to kids birthday party planning. Whether she’s making a new farmhouse craft for her home or helping her kids with a cool activity, you can bet she’s in the middle of some kind of DIY project (or three) right now!



I like your style, Emily! I would love it if you would share this cute mason jar craft at my Friday with Friends link party: https://myhubbardhome.com/friday-with-friends-advancing-into-spring-link-party/
Thank you,
Rachelle
FABULOUS tutorial, Emily! We will be featuring you starting Wednesday at the Creative Crafts Linky Party! Pinned and shared
Creatively, Beth
Thanks so much for the feature!!