
How to Make a Farmhouse Bow
Decorating your front door with a farmhouse wreath is a great way to add a seasonal touch to your outdoor decor. In fact, wreaths are some of my favorite farmhouse DIY projects! But if you’re making your own DIY farmhouse wreath, you’re going to need a great farmhouse bow to add to it! If you’re wondering how to make a farmhouse bow, you’ve come to the right place! Check out my easy farmhouse bow tutorial to learn how to make your own two-layered bow for all your wreaths.
This post contains affiliate links, which means I may earn a commission if you purchase something from my link (at no additional cost to you). Thanks for your support!

This two-layer bow may look complicated, but it’s actually pretty simple to make. And once you learn how to put it together, you can create a different farmhouse bow for each holiday. Just swap out the colors of ribbon and you have a festive decoration for each of your holiday wreaths!
Get your home ready for fall by decorating your front door! Use your burlap bow to dress up a fall farmhouse wreath for your front porch.
Farmhouse Bow Tutorial
This simple burlap farmhouse bow is perfect for any farmhouse wreath. On top of being simple to make, you can also adjust the size and color to make it your own!

To make your own farmhouse bow for a wreath, you’ll just need a handful of simple craft supplies, including:
- Solid color burlap ribbon with wire edge: Any color will work well for this farmhouse bow tutorial. I used orange because I was creating a fall farmhouse bow, but you can swap yours out for any color you want. Just make sure it has a wire edge to make it easier to manipulate and form.
- Striped ribbon with wire edge: Again, you can swap this out for any color or pattern you want. I love the black ticking on this ribbon — it’s perfect for a fall bow! I got this ribbon at Wal-Mart, if you were wondering.
- Floral wire or pipe cleaner: I ran out of floral wire, so I used an orange pipe cleaner to hold my farmhouse bow together. If you’re using a pipe cleaner, try to use a color that matches the color of ribbon you’re using to help hide the pipe cleaner.
- Scissors: Use a sharp pair of scissors to ensure you get clean lines when you trim the ribbon for your bow.
- Ruler or measuring tape: Make sure you cut the right length of ribbon so your bow isn’t too big or too small.
- Hot glue gun: You’ll need glue to hold your ribbon together.
After gathering all your supplies, it’s time to start creating your DIY farmhouse bow! First, you’ll need to cut the ribbon for your bow. I cut my orange ribbon three feet long and my black and white ribbon two feet long.
How to Make a Farmhouse Bow
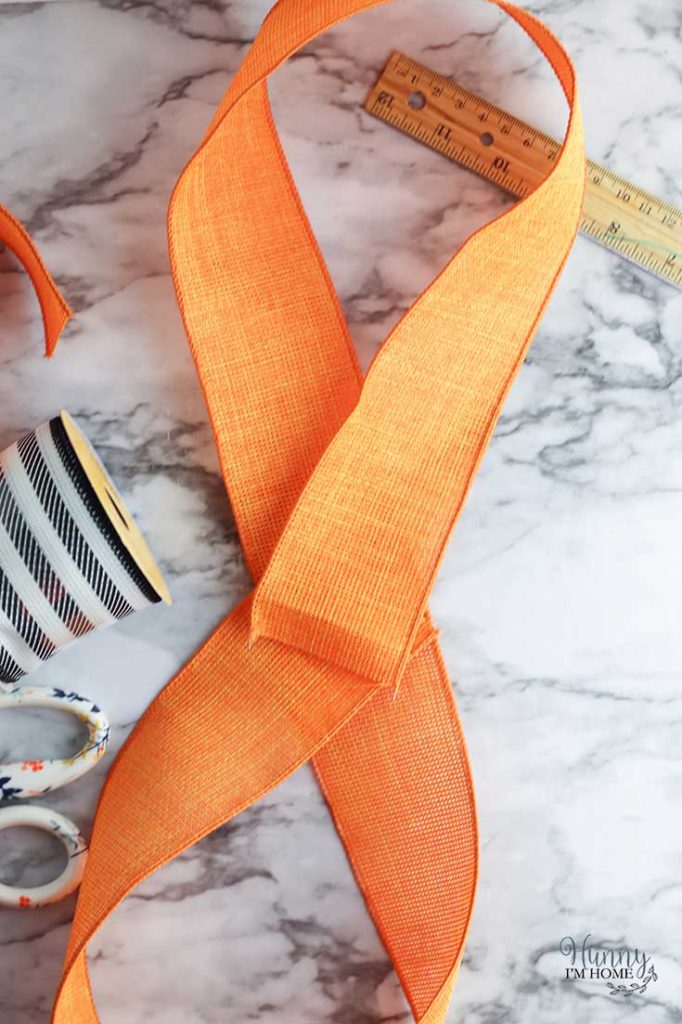
To make your own DIY farmhouse bow, you’ll start by making a figure eight with the larger ribbon. Make sure each of your ends meet in the middle. The best way to get your ribbon ready for tying is to start by making a pencil mark in the exact middle of the ribbon. Bring your bottom end of the ribbon up and around to the left, resting the end on the middle mark. Then, bring your top ribbon down and around to the right, resting the end of the ribbon on top of the bottom piece.

Next, bring both the top and bottom loops to the center of the ribbon. Stack the top loop over the ends of the ribbon in the center, then place the bottom loop on top of the top loop.

Gather all the pieces at the center of the bow between your fingers, pinching the bunch together.
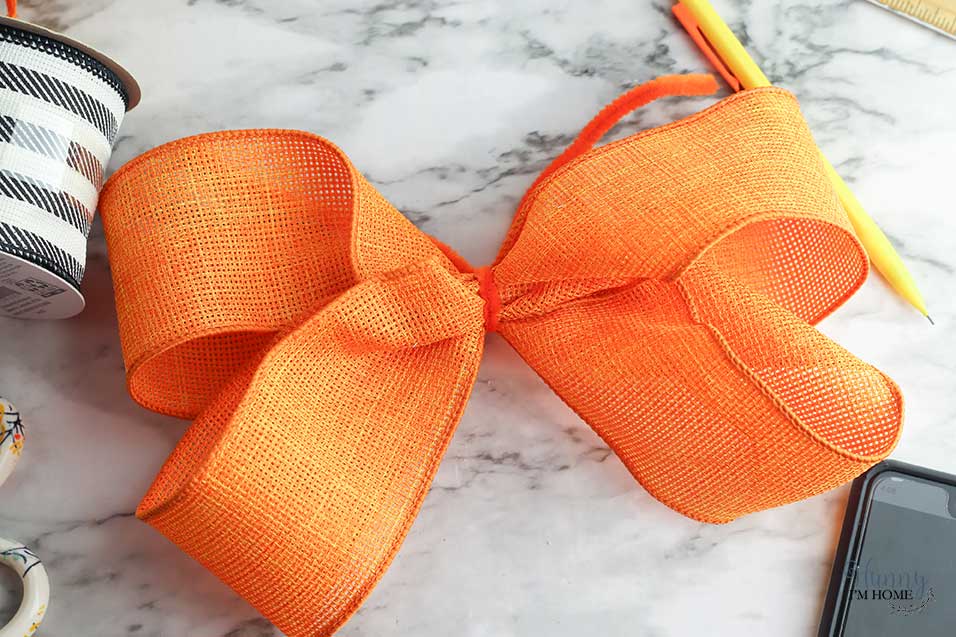
Secure the center of the bow with the pipe cleaner to hold it in place. Then, take a second to arrange your ribbon loops how you like them.
Two Layer Farmhouse Bow
Since this is a two-layer bow, you’ll need to repeat the process again with your smaller ribbon.

Make a figure eight with your striped ribbon, bringing both ends to the center of the ribbon. Lift the loops in toward the center of the ribbon and pinch the bunch of ribbon between your fingers.

Place your smaller bow on top of your larger burlap bow and use the remaining ends of the pipe cleaner to secure it in place. Just wrap each end of the pipe cleaner around the ribbon, then twist the ends of the pipe cleaner together to secure it.

Now that we have the loops of the bow finished, we can start adding the finishing touches. First, we’ll need to cover the pipe cleaner in the center of the bow and make it look more like a real bow. Cut a two to three inch piece of each ribbon to use as the center part of the bow.
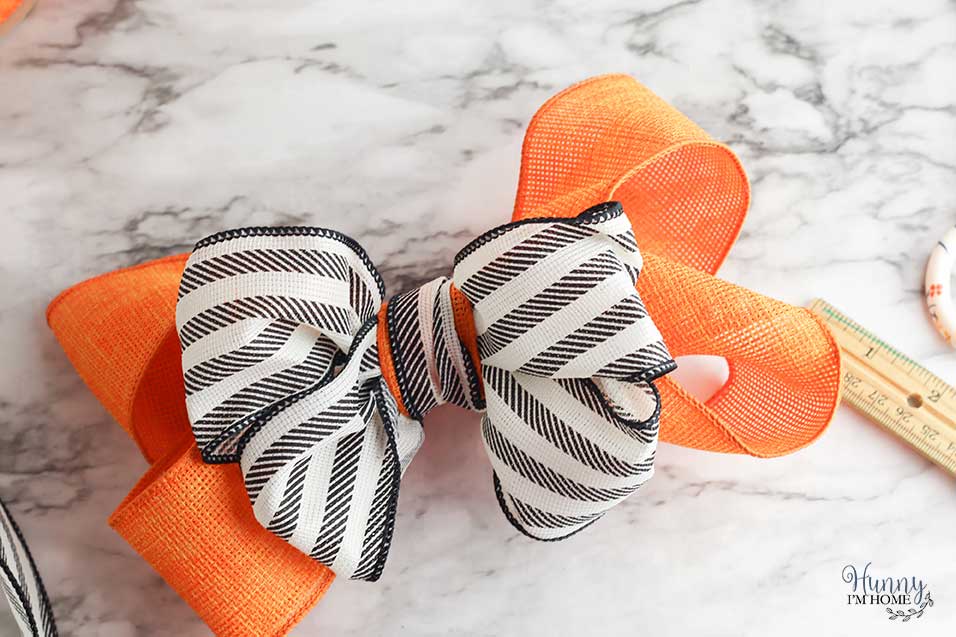
Grab your hot glue gun and place a drop of glue on the top of the bow. Put the solid colored (orange) ribbon on the glue and press it place. Add another drop of glue on top of the orange ribbon and add the striped ribbon. Press it in place until the glue dries. Then, flip your bow over and glue each of the ends of the ribbon to the back of the bow, making sure not to cover the pipe cleaner ends — you’ll need those to place your farmhouse wreath bow on the wreath.
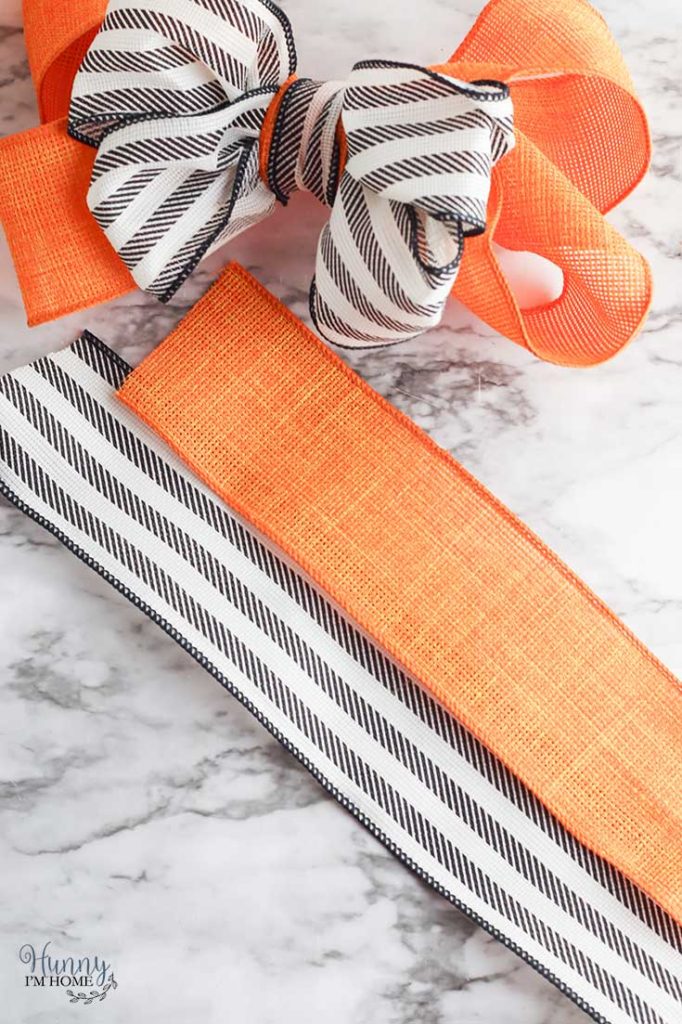
To make the tails for your ribbon, cut two pieces of each ribbon the length of the tails you want. You can use your wreath as a guide to measure how long you want your ribbon tails to be. as a reference, I made my tails around 8 inches long. It’s also a good idea to cut your striped ribbon just a little bit shorter than your orange ribbon so that the patterned ribbon doesn’t completely hide the solid ribbon when you attach the tails to the bow.

Use your hot glue gun to piece your ribbon tails together. Start by gluing your solid ribbons together at the top end, gluing them at an angle. Then, add the striped ribbon to the top of the solid ribbon, placing them at a wider angle to allow the orange ribbon to show through the bottom of the bow.

After that, all you have to do is attach your ribbon tails to the back of your ribbon. Add some glue to the top of the ribbon tails, then press the bow in place. Hold it there until the glue dries to ensure it stays in place when you hang it on your wreath.
Farmhouse Bow for a Wreath
This simple farmhouse bow is perfect for just about any farmhouse style wreath. I added mine to a farmhouse fall wreath using some pumpkin picks, eucalyptus leaves, and a cute fall sign I found at Dollar Tree.

To attach your farmhouse bow to a wreath, use the extra length of pipe cleaner or floral wire to hook it to the wreath. Wrap the ends of the wire around the wreath to secure the bow in place. Or use your hot glue gun to glue the bow in place on your wreath.

How to Tie a Farmhouse Bow
This simple DIY farmhouse bow is perfect for any farmhouse style wreath.
Materials
- Solid burlap ribbon
- Patterned wire edge ribbon
- Floral wire or pipe cleaner
Tools
- Scissors
- Ruler
- Hot glue gun
Instructions
- Cut the solid burlap ribbon three feet long. Cut the patterned ribbon two feet long.
- Create a figure eight with the burlap ribbon, bringing both ends to the center of the ribbon.
- Bring the top loop to the center of the ribbon and hold it in place, then bring the bottom loop to the center of the ribbon.
- Pinch the ends and loops at the center of the ribbon together between your fingers and secure it in place with a piece of floral wire. Set aside.
- Repeat the process with the patterned ribbon, then place the patterned bow on top of the solid bow. Secure the patterned bow with the floral wire.
- Cut a three inch piece from each ribbon and glue them on top of the bow to cover the floral wire. Glue the ends of the ribbons to the back of the bow.
- Cut two eight-inch pieces from each ribbon to create the tails. Glue the two solid pieces together at the top of the ribbons, then glue the two patterned pieces on top of the solid pieces. Attach the tails to the back of the ribbon.
- Use the remaining ends of the floral wire at the back of the ribbon to attach the farmhouse bow to a wreath.
More Fun Farmhouse Craft Ideas:
Rustic Farmhouse Mason Jar Lid Wreath
Easy DIY Farmhouse Style Popsicle Stick Coasters
DIY Fall Farmhouse Wreath with Removable Bow
If you like this post, you’ll probably like these:



Emily is a midwestern mom of two boys. She loves all things DIY — from home renovations to kids birthday party planning. Whether she’s making a new farmhouse craft for her home or helping her kids with a cool activity, you can bet she’s in the middle of some kind of DIY project (or three) right now!


Can I just say this was such an easy read!! Super simple!! I’ve been trying to find a tutorial or quick read to learn and this was one I just found and loved it!! Thanks!!!
Thanks, Jessica! I’m so glad it was helpful!!