DIY Lego Party Decorations with Dollar Tree Boxes
Hosting a LEGO birthday party is a great idea for kids of any age! If your kid is a fan of those little building blocks, this party theme is sure to be a hit. But the best part about this easy theme is that you can save tons of money by making your own party supplies! With these easy
This post contains affiliate links, which means I may earn a commission if you purchase something from my link (at no additional cost to you). Thanks for your support!

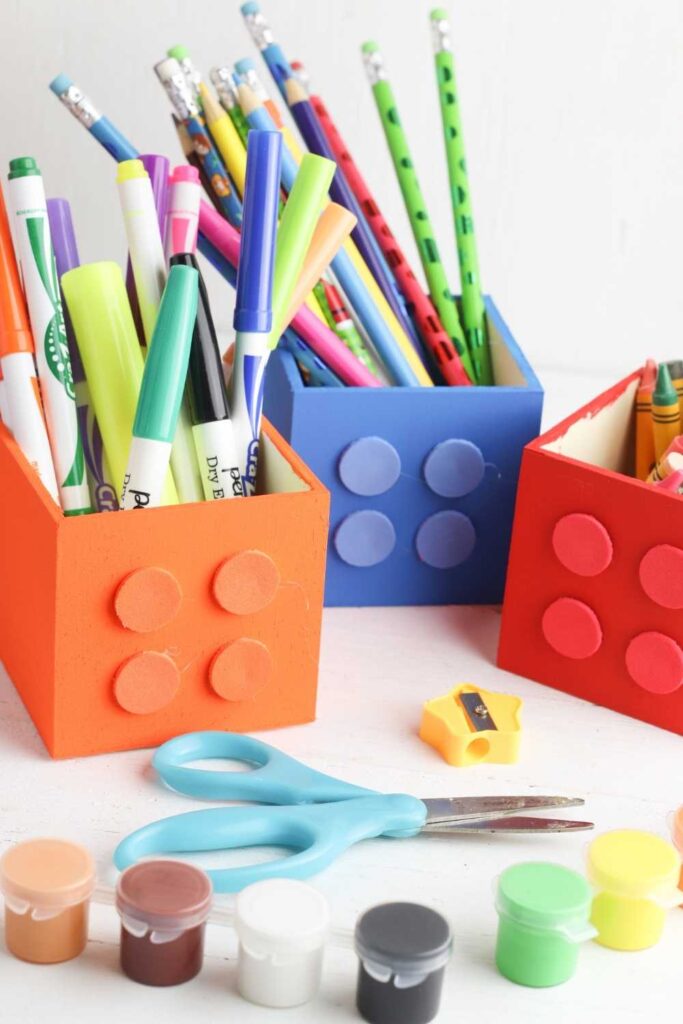
Not only are these cute Lego boxes so easy to make, you can use them after your party is over, too. Add them to your party decor, then use them to store your kid’s markers, pencils, and pens!
DIY Lego Party Decorations
These cute little LEGO boxes are the perfect addition to the rest of your party decorations. We used the mini boxes to hold the balloon weights for the LEGO balloons. But you can use them in a variety of different ways at your own party!
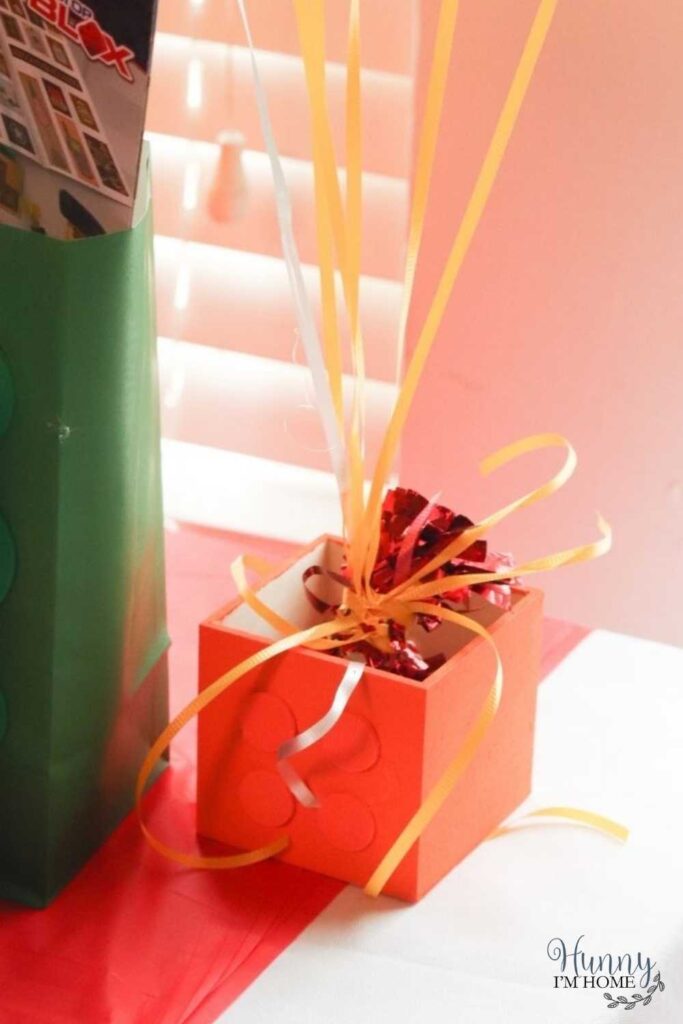
These DIY Lego party decorations are so easy to make — especially if you have a Cricut at home! I’ll give you instructions for putting these together with your cutting machine and by hand.
Either way you plan to make them, to make these cute wooden LEGO boxes, you’ll need:
- Wood boxes. I found these little wood boxes at Dollar Tree in the craft section. But you can find similar boxes at most craft stores.
- Paint. To give your LEGO boxes the look of classic LEGOs, use primary colors like red, blue, yellow, and green. Or you can create LEGO Friends style boxes by using pastel colors, like pink and purple.
- Foam sheets. Use foam sheets in the same colors as your paint to create the dots on the front of your LEGO boxes. Make sure to match the paint with the color of the foam as closely as possible for a more realistic look.
- Cricut or scissors. To cut the round pieces for the front of your boxes, you’ll need to cut the foam sheets into small circles. The easiest way to do this is to use your Cricut. But if you don’t have a cutting machine, you can cut the circles by hand or use a one-inch round punch to cut out the circles.
- Glue. If your foam sheets aren’t sticky on the back, you’ll also need some glue to attach the round pieces of foam to the front of your boxes.
How to Make a Lego Box
These fun DIY party decorations are a great way to dress up your celebration with some custom decor. And since you can use these boxes after the party, they’re the perfect craft to work on today!

The first step to making these decorations is to paint your boxes. Give each box a coat of paint in the colors you’ll be using for your party. While the paint is drying, you can work on cutting out the foam pieces for the front of each box.
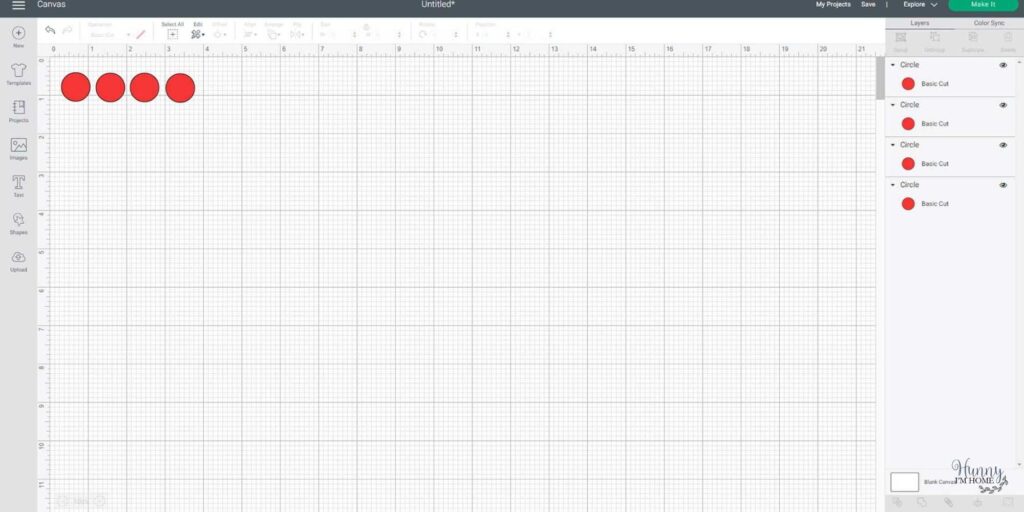
To make the round circles on the front of each box, you can use your Cricut to cut the circles from the foam sheets. Start by creating circles in Design Space with the shape tool. You’ll need to cut four circles from each color, so draw four circles on your template. Each circle should be one inch wide to fit on the Dollar Tree boxes I used.
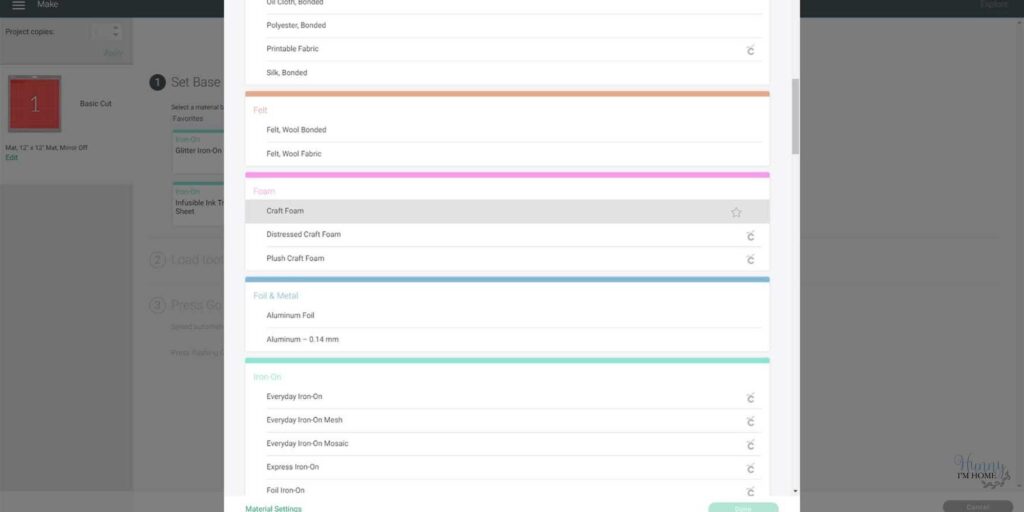
After drawing the circles, you’re ready to start cutting. Load the foam sheets on your cutting mat. Then, set the dial on your Cricut to Custom. When you hith the Make It button in Design Space, you’ll have the option to choose what type of material you’ll be cutting. Scroll down to find Craft Foam on the list and select it.
Make sure you use a light grip cutting mat for this project. If your cutting mat is too sticky, the craft foam will stay stuck and rip as you’re trying to pull the circles off the mat.

Start cutting your craft foam with your Cricut. But when the cutting process is done, don’t immediately remove the sheet. Instead, check to make sure that the foam is cut all the way through. If it’s not cut, just hit the flashing Cricut logo again without removing the cutting mat. This will cut the project again in the exact same spot. I had to run my foam sheets through three different times for them to fully cut.
It’s important that you don’t remove the cutting mat. If the cutting mat is removed, you’ll need to start over because the blade probably won’t cut in the exact same spot again.
Once the foam is fully cut, carefully remove the round pieces from the mat. If the foam seems to be stuck on the mat, try using your weeding tool to loosen the grip and keep the foam from ripping.

Lay the round pieces on the front of the box, making sure they’re centered and evenly spaced. When you’re happy with the placement of the dots. Use a hot glue gun to attach each foam piece to the front of the box.
Continue cutting the round pieces and gluing them into place until you have all your boxes decorated. After that, you can use them to decorate your part table or in your kid’s room to help keep their desk organized!
DIY Lego Party Decoration Ideas
After you put your LEGO boxes together, there are so many different ways to use them! Try these DIY LEGO party decoration ideas to come up with some fun ways to decorate your party table with your DIY lego boxes.
- Dress up your balloon weights. Balloon weights are a great way to hold your balloons in place and keep them from floating away. But they’re not very pretty! Luckily, these little boxes are perfect for hiding the weights. Simply tie the balloons trings to the weight, then place the weight inside the box.
- Use the boxes as risers on your food table. These cute LEGO boxes are great for adding some height to your party food table. Just place your plates or serving dishes on top to create different heights for all your party food.
- Add some straws and utensils. In addition to holding the balloon weights at your party, you can also use these boxes to hold your straws and eating utensils. They’d also make great napkin holders!
- Stack them as decorations. Instead of filling the boxes, why not use them as decorations! Simply stack up your LEGO boxes on the table to add a cute DIY decoration to your party table.
- Use the boxes after your party. Unlike most DIY party decorations, these boxes have tons of great uses after the party is over! My favorite way to use our LEGO boxes is as organizers on my son’s desk. The boxes are perfect for holding small items, like markers, pencils, and scissors.

DIY Lego Boxes
Turn a plain dollar store wooden box into an adorable decoration for your Lego birthday party with this simple craft project.
Materials
- Small wooden boxes (from Dollar Tree)
- Paint
- Paint brush
- Craft foam sheets
Tools
- Cricut
Instructions
- Paint the outside of each box in primary colors.
- Open Design Space and draw four circles. Resize the circles to fit four circles on the front of each box. Mine were one inch each.
- Set the Cricut to cut craft foam. Load the foam sheet in the color that matches your box and cut out the circles.
- Use a hot glue gun to attach the circles to the front of the box.
More Fun Lego Activities:
Lego Popsicle Stick Catapult Activity
Lego Parachute Coffee Filter Activity
If you like this post, you’ll probably like these:


Emily is a midwestern mom of two boys. She loves all things DIY — from home renovations to kids birthday party planning. Whether she’s making a new farmhouse craft for her home or helping her kids with a cool activity, you can bet she’s in the middle of some kind of DIY project (or three) right now!