
How to Make a Paper Flower Centerpiece
Paper flowers a fun an whimsical way to decorate a party, making them a great choice for kid’s birthday parties. Luckily, making a paper flower centerpiece is a simple project, and it’s a cheap and beautiful way to decorate a table. For your next kid’s birthday party, make some of these easy paper flowers to create a beautiful centerpiece for a fraction of the cost of real flowers.This post contains affiliate links, which means I may earn a commission if you click a link (at no additional cost to you). Thanks for your support!

My paper flower centerpiece was made out red tissue paper with accents of faux daisies. To make a tissue paper flower, all you’ll need is a package of tissue paper and a pipe cleaner. It’s wonderful how something so simple can add such an impact to your party’s decor.

Not only are these tissue paper flowers super simple to make, but they also come together really fast. I’m going to tell you how to make a few different sizes of flowers for your paper flower centerpiece, which will add some depth to the bouquet and make it look great on the table.
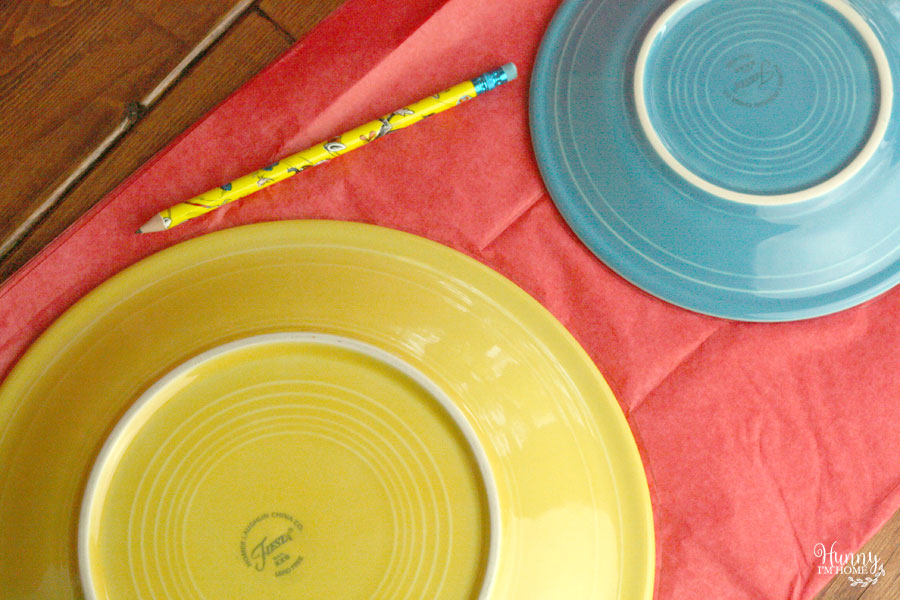
I used some plates to measure my flowers so I knew each flower would be uniform in size. I used a larger dinner plate for my bigger flowers and a small saucer for my little flowers. I spread out the tissue paper and traced each plate with a pencil. To keep the paper from shifting while I cut out the circles, I added a couple of pieces of tape along each edge. Then, I cut out the circle for each flower until I had enough to fill the vases. To make one flower, you’ll need sheets from an entire package of tissue paper. I was able to get two small and one large flower per package.
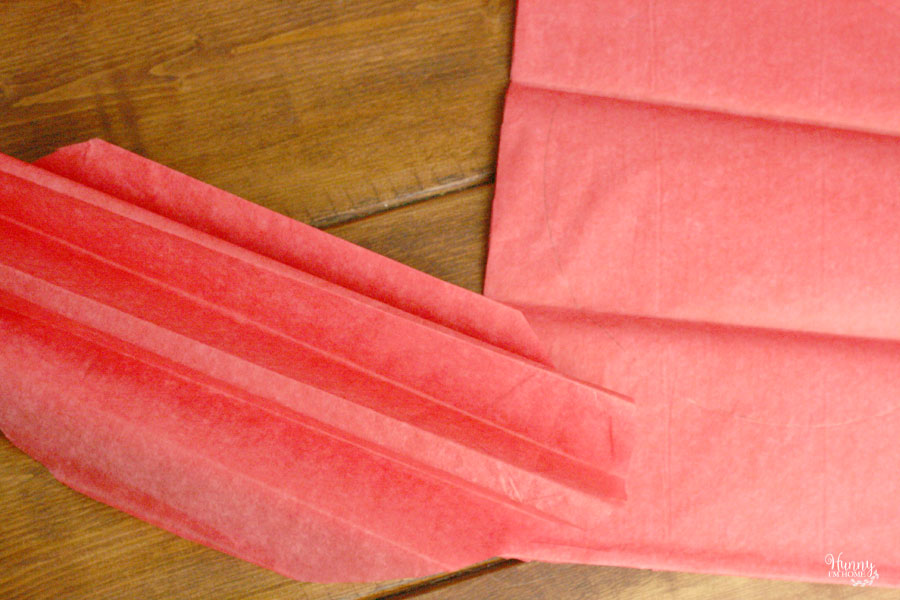
After you have all of you circles cut, it’s time to make the flowers. Start by folding each circle, accordion style, with half-inch to one-inch folds.
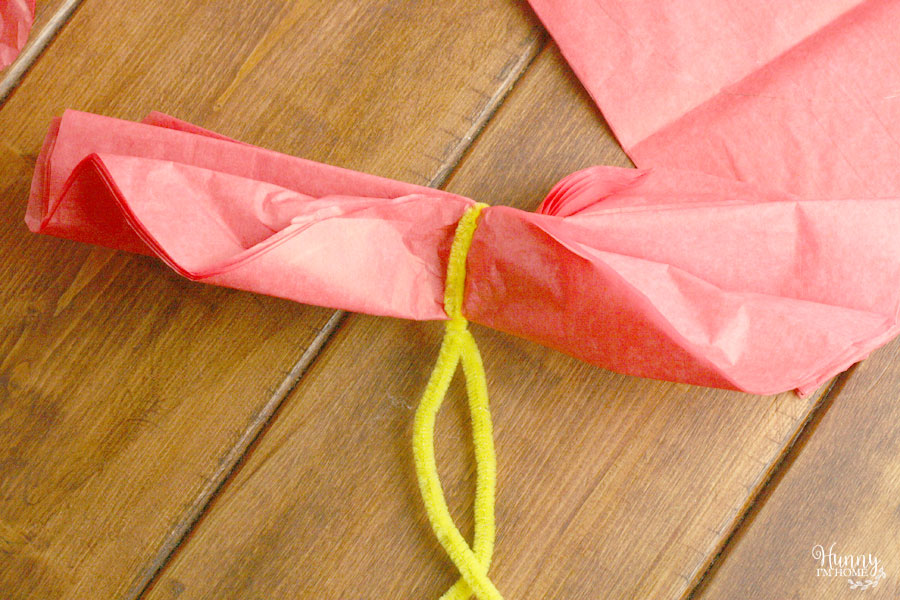
Then, wrap a pipe cleaner (you could use floral wire too) around the center of the circle and twist the pipe cleaner to secure it. To form the flowers, simply pull each piece of the tissue paper toward the center of the flower until all of the paper has been fluffed. Finish the flowers by adding a small piece of tape on each side to secure the bottom layers together. I also smashed the center of the flower down a little bit to add more texture to each bud.
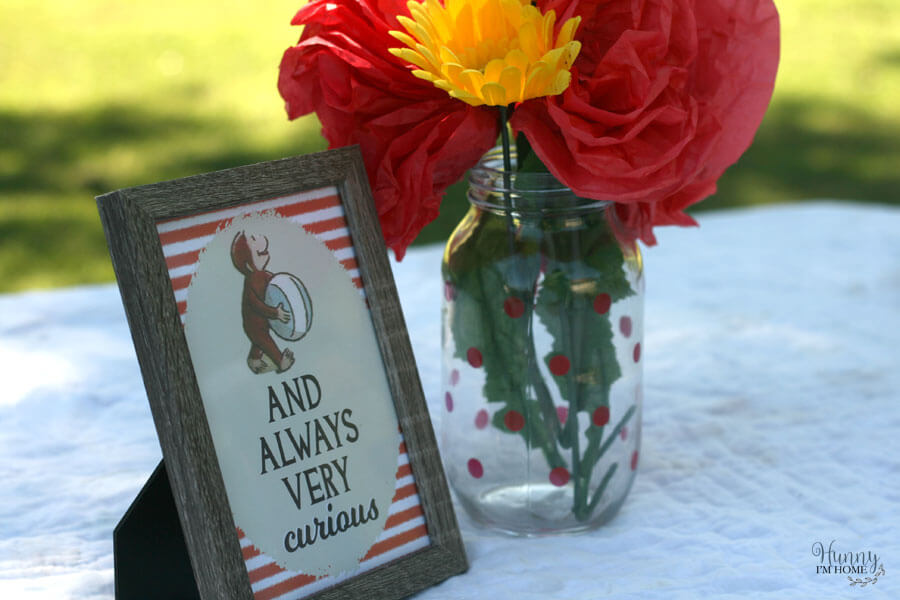
My centerpieces were made using two small paper flowers and one large paper flower. I stuck them into a painted mason jar and added a few yellow daisies for an extra pop.
If you like this post, you’ll probably like these:
 |
 |
 |
| How to Make a Banner out of Book Pages |
Simple and Delicious Gluten Free Banana Pudding |
How to Make a Bunting Cake Topper Out of Book Pages |

Emily is a midwestern mom of two boys. She loves all things DIY — from home renovations to kids birthday party planning. Whether she’s making a new farmhouse craft for her home or helping her kids with a cool activity, you can bet she’s in the middle of some kind of DIY project (or three) right now!


What a great craft idea! These look really easy to make but create such an impact!
That’s such a cute idea! And so much cheaper than buying real flowers! I’m going to try making some for myself!
These are a fun project that the kids and I can do together. I remember making these from facial tissue when I was a kid. Of course, they were no where as sophisticated or beautiful as these!
Oh my goodness these flowers are SO cute and simple! I love how you can use them for a centerpiece at a birthday or dinner party… It’s such a fun and whimsical DIY touch!
I can’t believe those are paper flowers. They look so good. Very cute decorations.