
Paper Bag Bunny Craft with Cricut Template
We love making simple crafts for kids to celebrate each holiday! It’s such a fun way to spend quality time with your kids — especially during the Spring. And what better way to celebrate Easter this year than with an cute preschool craft? This fun paper bag bunny craft is not only adorable, but it’s also fun to make! And since all you have to do is download the printable template and use your Cricut to print then cut the pieces, your kids can make this rabbit puppet in a matter of minutes.
This post contains affiliate links, which means I may earn a commission if you purchase something from my link (at no additional cost to you). Thanks for your support!

I love this simple paper bag puppet craft so much because it’s so simple to make, kids of any age can put it together! Thanks to the bunny craft template, all you have to do is download and print! You can even use your Cricut to speed up the prep work of this craft even more.
Looking for more Easter craft ideas? Check out these Easter popsicle stick crafts to find more fun projects to make for the holiday.
Paper Bag Easter Bunny Craft
Your kids will have so much fun putting together this adorable Easter bunny craft idea — whether they’re in preschool or kindergaten! And the best part is that you can quickly and easily download my printable bunny ears and bow tie to create your craft today.

The thing I love most about this easy craft is that it’s simple enough that kids of any age can make it! That means it’s perfect for making at home or in the classroom during the Spring months.
And since you only need a handful of supplies, you probably already have everything you need to put this project together right now. Here’s what you’ll need to make your own Easter bunny paper bag craft:
- Paper bag: We used white paper bags to make this cute Easter bunny puppet. Once you add the decorations, your kids can stick ther hand inside and make their bunny talk!
- Googly eyes, white pipe cleaner, and pink button: To create the face for your Easter bunny, you’ll need a pair of googly eyes, white pipe cleaner for the whiskers, and a pink button nose.
- Cardstock: Print out the bunny face template on cardstock to ensure your bunny’s ears stand up nice and straight.
In addition to these craft supplies, you’ll also need glue and scissors to put this craft together. Or if you have a Cricut at home, you can use it to print then cut the template and you don’t have to worry about cutting out each piece of your bunny craft.
Easter Bunny Cricut Craft
The first step to creating this paper bag Easter bunny craft is to download the bunny ears template. After you grab your printable, you can start putting everything together.
To make your paper bag bunny, you’ll need to start by downloading the free printable ears and bowtie. Get yours by signing up for my newsletter here.

After subscribing, you’ll receive a welcome email with a password exclusively for my subscribers. If you don’t see the message shortly after submitting your contact information, be sure to check your junk or spam folders and add my email as to your safe list! I’ll keep you up-to-date on new freebies on a regular basis after that.
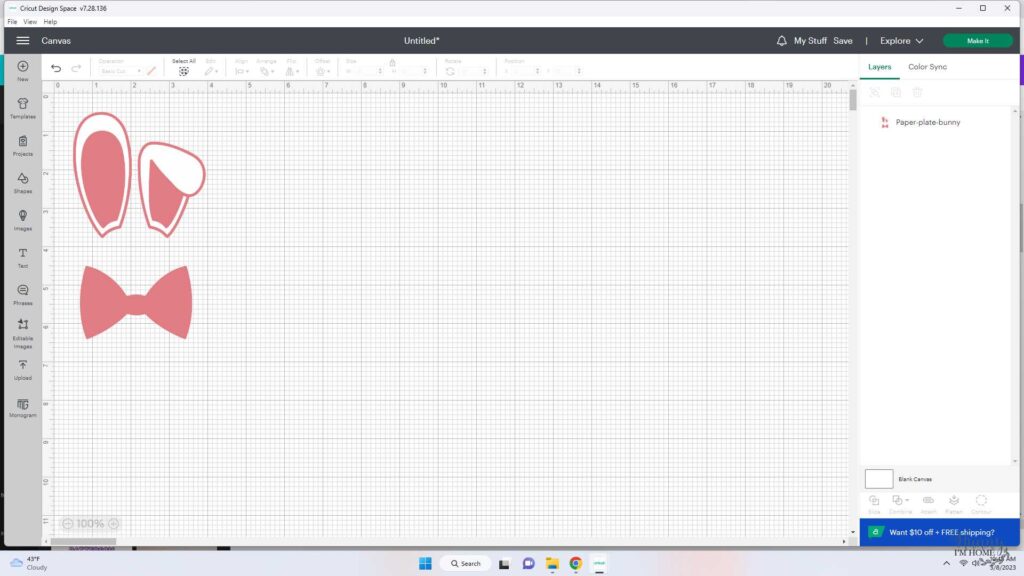
Once you receive the password delivered to your inbox, you can access the freebie page. There, you’ll find two different versions of the printable template:
- PNG: You can use the PNG version of the ears and bowtie to print then cut the design in Cricut Design Space.
- PDF: If you don’t have a Cricut, download the PDF version to cut out the ears and bowtie using scissors.
If you plan on using your Cricut to cut out the template, keep reading to get detailed instructions on how to cut the file. Once you download the PNG from my freebie page, simply upload the file into design space. After that, select the Print then Cut Image option.
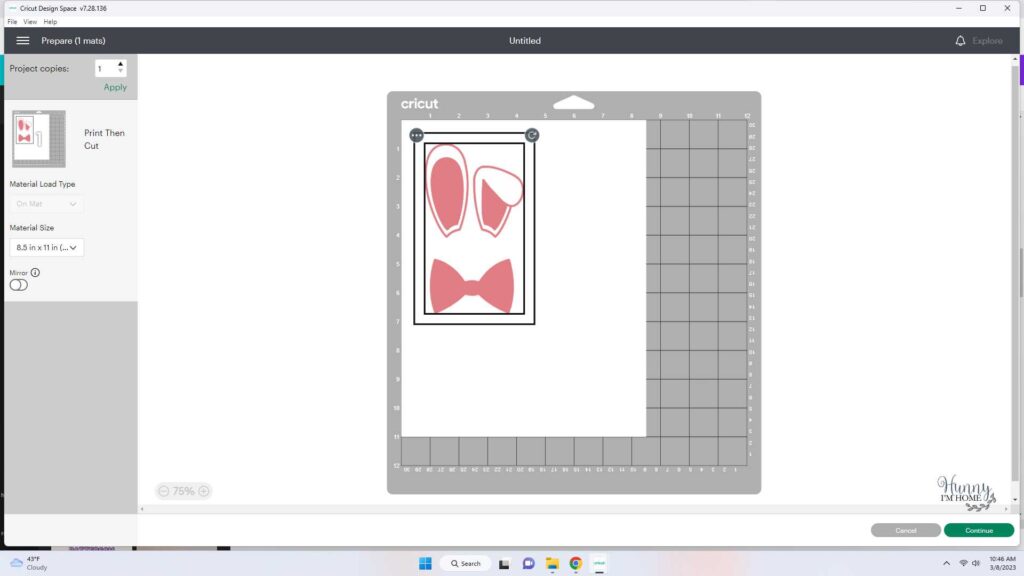
Resize the elements of the template file, if needed, to fit on your paper bag. Then, hit the Make It button and select your printer. Place a sheet of white cardstock in your printer and print the template.
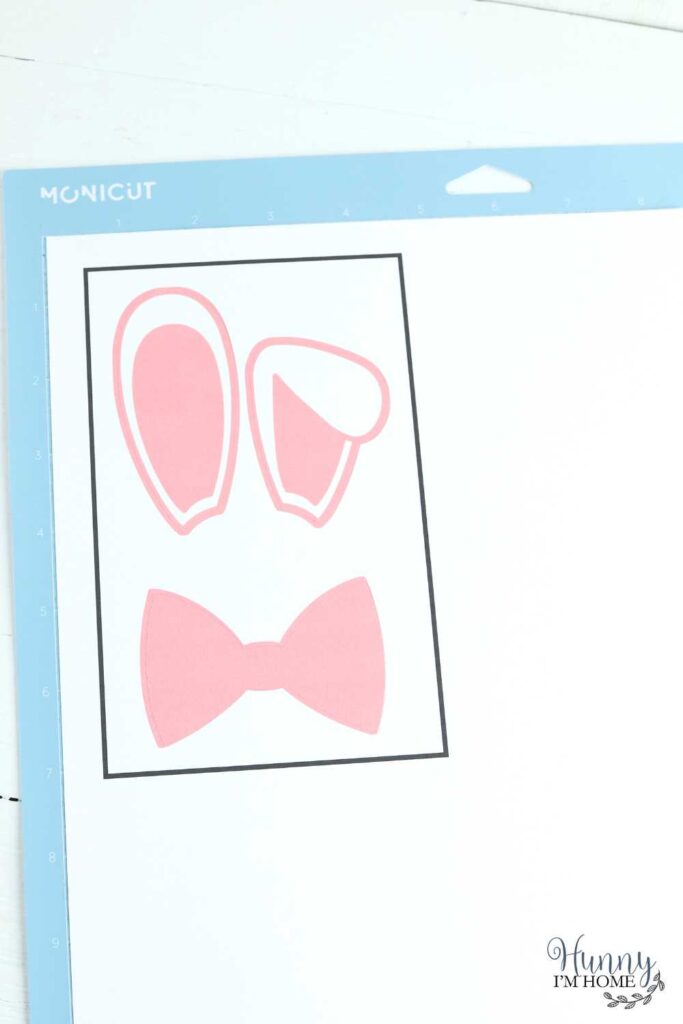
After the design is finished printing, put the printed paper on your cutting mat and load it into your Cricut. Then hit the start button on your machine to cut out each ear and the bowtie. Remove the pieces from your cutting mat and give them to your kids to make their own popsicle stick bunny.
How to Make a Paper Bag Bunny
In addition to using your Cricut to cut out the pieces for your Easter bunny craft, you can also use scissors. Just download the PDF version of the printable from my freebie page and print it out on cardstock. Then, use scissors to cut out each ear and the bow tie around the outer edge of each piece.
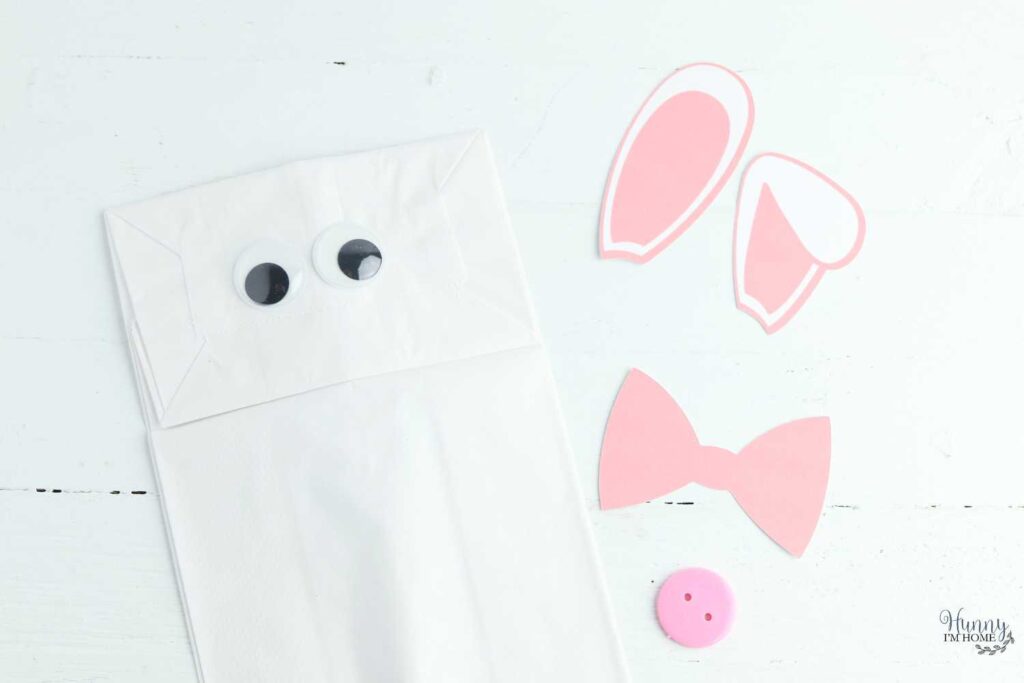
After your pieces are cut out, you can start putting your Easter bunny craft together. First, place the bag on your work surface upside down with the bottom flap of the bag on the top. Then, place a pair of googly eyes on top of the flap.
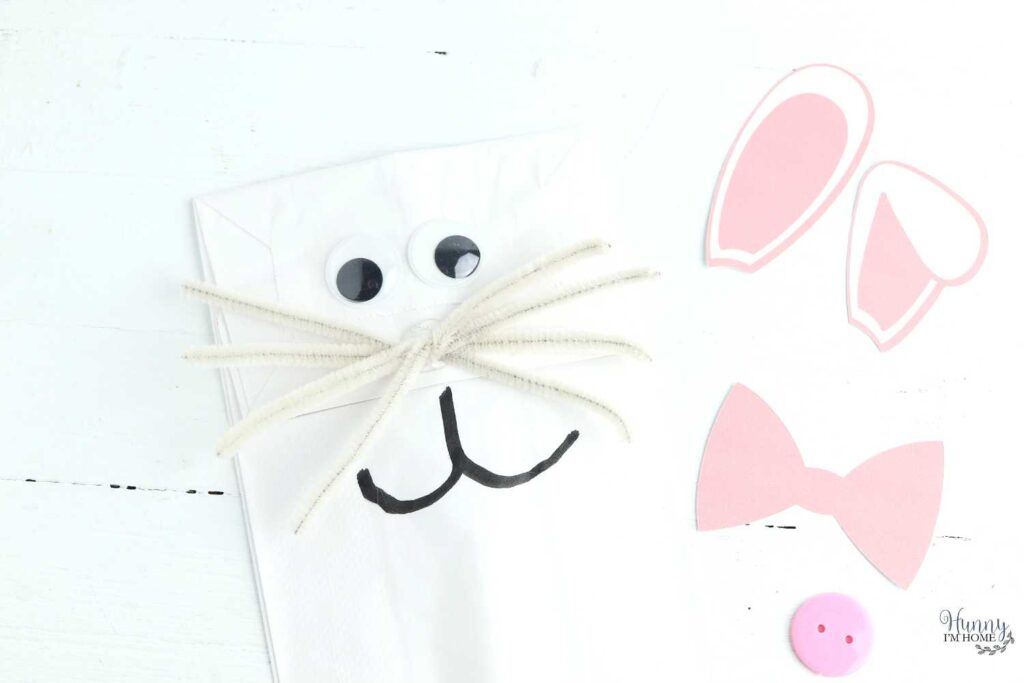
Next, create the whiskers for your bunny by cutting two white pipe cleaner in half. Line up all four pieces evenly, then twist them together in the center. After that, spread the pieces apart to create the look of whiskers.
Glue the pipe cleaner whiskers under the eyes, making sure to hold them in place until the glue dries. Then, use a black market to draw a bunny mouth on the center of the bag under the whiskers.
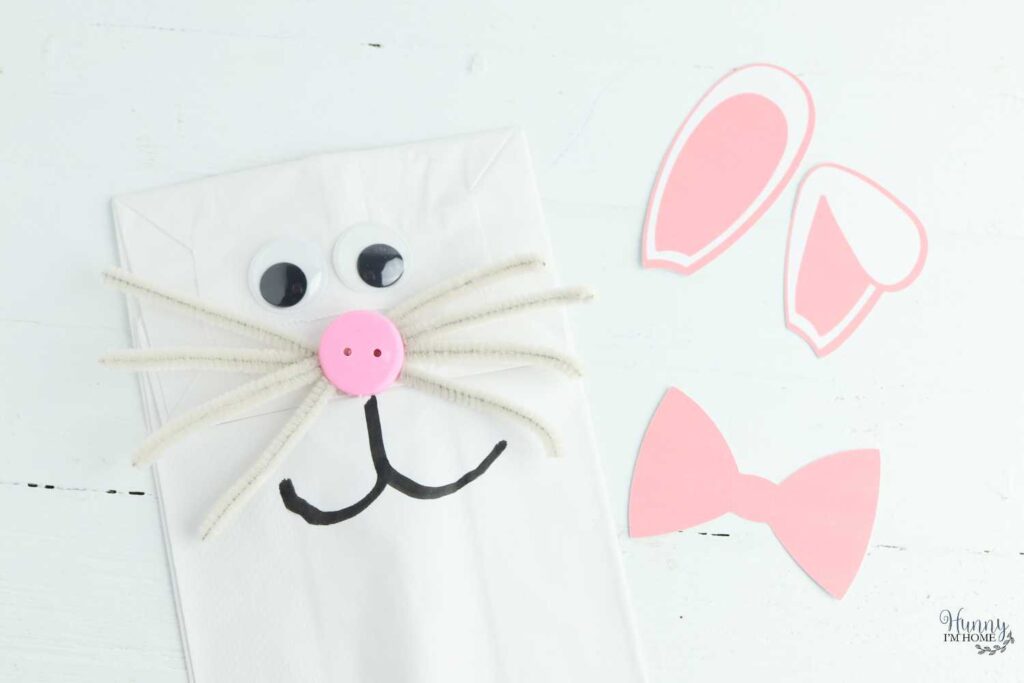
Finish making the face of your paper bag bunny by gluing a button onto the top of the whiskers. Hold the button in place until the glue dries.

After that, all that’s left to do is add your bunny ears and bow tie. Glue the bunny ears to the top of the bag above the eyes. And glue the bow tie under the mouth.
Once you have all the pieces glued in place, allow the glue to dry completely before your kids start playing.
Easter Bunny Paper Bag Craft Ideas
This cute craft is such a fun way to celebrate the Easter holiday. As you’re putting your Easter Bunny together, you may have questions along the way. Take a look at these common questions for more Easter crafting ideas.

How do I make an Easter Bunny paper bag puppet?
Turning this craft into a cute puppet is so easy! After all the decorations on the top of the bag have dried, simply slide your hand into the opening at the bottom of the craft. Stick your fingers through the flap at the top and keep your thumb in the bottom half of the bag, forming a C shape with your hand. Move your fingers and thumb toghether and apart to make the bunny puppet talk.
Which file should I use with my Cricut?
After signing up for my newsletter and heading to my freebie page, you’ll notice there are two different file types to choose from. If you plan to use your printable with your Cricut, you’ll need to use the PNG version of the file. This file features a transparent background, which is essential for your machine to cut the pieces correctly.
After downloading the PNG, just upload it into Design Space, select the Print Then Cut option and Make It to print then cut the template.
Which file should I use if I don’t have a Cricut?
If you don’t have a Cricut, don’t worry! You can still use this template to make your own paper plate bunny. If you’re not using a Cricut, you’ll need to download the PDF version from my freebie page. After downloading the PDF, just hit the print button to print out your template. Then, use a pair of scissors to cut out each piece around the outer border.

Paper Bag Easter Bunny Craft
Use your Cricut to print then cut the ears and bowtie for this adorable paper bag Easter bunny craft.
Materials
- Printable bunny ears and bow tie
- White paper bags
- Googly eyes
- White pipe cleaner
- Pink button
Tools
- Cardstock
- Cricut or scissors
- Glue
Instructions
- To use your Cricut to cut the ears and bow tie, download the PNG and upload into Design Space. Select the print then cut option.
- After uploading, hit the Make It button and select your printer. Print the graphic on cardstock, then place it on your cutting mat. Cut the printable with the Cricut.
- To cut the ears and bow tie with scissors, print the PDF on cardstock and cut each piece out around the outer border.
- Lay a white paper bag upside down on the table, with the bottom flap facing up.
- Place two googly eyes on top of the flap.
- Cut two pieces of pipe cleaner in half. Line them up evenly and twist them together in the center. Glue the whiskers to the center of the flap under the eyes.
- Top the whiskers with a pink button.
- Draw a mouth with a black marker.
- Glue the bowtie to the center of the bag and glue each ear to the top of the bag.
Recommended Products
As an Amazon Associate and member of other affiliate programs, I earn from qualifying purchases.

More Fun Kids Craft Ideas:
Jello Pie Easter Bunny Parfait in a Jar
Dollar Tree Easter Crafts for Adults & Kids
If you like this post, you’ll probably like these:


Emily is a midwestern mom of two boys. She loves all things DIY — from home renovations to kids birthday party planning. Whether she’s making a new farmhouse craft for her home or helping her kids with a cool activity, you can bet she’s in the middle of some kind of DIY project (or three) right now!


