
How to Make Mini Party Hats
As I was researching decoration ideas for Noah’s dinosaur-themed birthday party, I kept coming across photos of cute tiny party hats placed on plastic dinosaur toys. I knew right away that I wanted to incorporate the idea into my decor. These mini party hats are one of my favorite DIY party ideas!
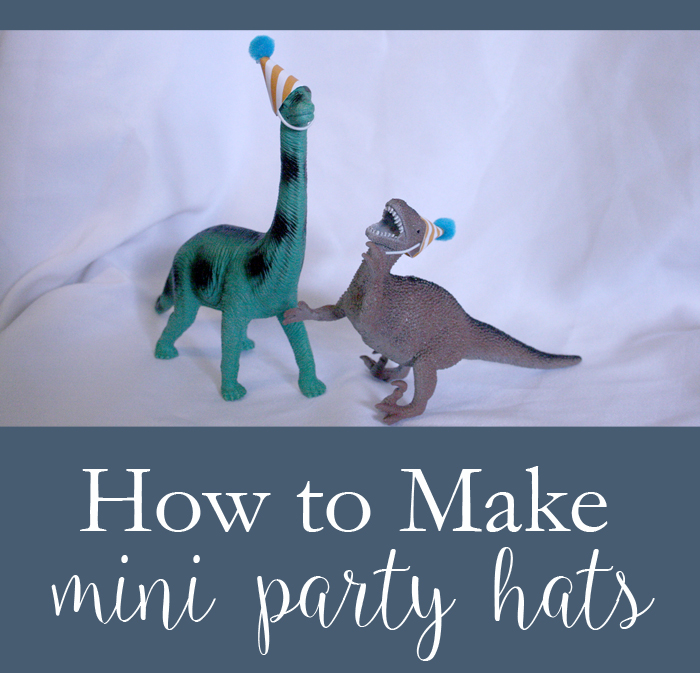
I ventured over to This Heart of Mine and used her template as a guide for making these adorable party hats. While she suggests cutting out her PDF template and tracing the hats by hand (which is perfectly simple), I cheated a little and used my Silhouette Cameo 

I pulled up her party hats template in Photoshop
After copy and pasting several hats, I was ready to cut the file. I used a very lightweight card stock with white and orange stripes to create my hats, which I purchased at Hobby Lobby (for half price!). I just used the card stock setting on my Silhouette to cut the paper. Be sure to use your less sticky mat

Once the hats were cut, I removed the negative paper and slowly pulled each hat off my mat. For the stubborn ones, I use a straight pin to slide up underneath the paper and wiggle it free.
Next, I folded over one edge of the hat to have a place to put my line of hot glue. WARNING: you will get glue on your fingers, so be prepared to get a little burnt!

Just put a line of hot glue along the fold, then quickly fold the hat over upon itself and hold tight for a few seconds as the glue cools.

Then, set the hat upright and place a dot of glue right on the top of the party hats.

Working quickly, grab a pom pom and place it on top, applying slight pressure to make sure it is secure.

After I had finished several hats, I started trying them on Noah’s dinosaurs to see if they fit, which resulted in an epic party-hat-clad dinosaur fight. He was getting frustrated that the party hats weren’t staying on the dinosaurs’ heads, so I later added strips of elastic to each hat to make them more secure (sorry, I forgot to photograph that part!).

As you can see from the party photo, the dino party hat theme extended to the treat bags as well!
Here’s how to make these adorable mini party hats:
Supplies
Template
Scissors (or Silhouette)
Cardstock
Pompoms
Glue gun
Elastic
- Use the template to trace and cut out party hat shapes.
- Make a small fold on one side of the hat.
- Draw a line of glue along the fold.
- Wrap the hat around, gluing each side together. Hold tightly for a few seconds.
- Add a drop of glue to the top and place pompom on glue, holding to secure.
- Cut a small strip of elastic and glue each end to the inside of the hat.
- Place on dinosaur’s head and party!
If you you’re looking for more projects or inspiration, check out these other posts:
Dinosaur Themed Birthday Party Inspiration

Emily is a midwestern mom of two boys. She loves all things DIY — from home renovations to kids birthday party planning. Whether she’s making a new farmhouse craft for her home or helping her kids with a cool activity, you can bet she’s in the middle of some kind of DIY project (or three) right now!



Such a super cute idea!! And it adds a lot of fun to your table. 🙂
This is really helpful, thankyou for sharing with us.
Made these to use as centerpieces and take-home-gifts for my daughter’s 3rd birthday. Super cute and way better than spending $20 a dino via Etsy. Thank you for the easy-to-follow instructions!
So happy to hear they were a hit at your party!!
Would you be willing to share your silhouette file you created of the hats?
Hi Casey! There is a link to the template I used at the top of the post, along with instructions on how to use it in Silhouette.